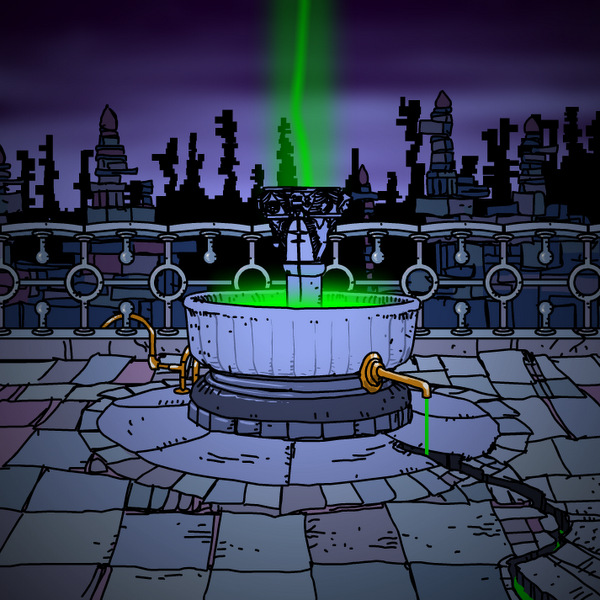
Submachine 9, -ak- review


SUBMACHINE 9 REVIEW

You all know this is coming… The beginning of the end. Submachine 9: the Temple, the penultimate chapter of the legendary Submachine series crafted by Mateusz Skutnik is only a fingertip away from the click of our mouse, tugging at the minds of all who yearn to see the story coming to full circle. And came to (almost) full circle, the story does while also blowing, shattering, and vaporizing all of our doors right off the hinges with some absolute shockers of gameplay and plot twists. Submachine 9 make no apologies with what it sets out to do while leaving us cowering in prospects of our doom, knowing that the entire main series will end soon.

With styles.

—————————

GRAPHIC

Once more, with feelings. Our old song and dance. Again and again, no beginning nor end like the haunting Loop. After the last two jaw-dropping entries that entranced the PNC worlds with their revelatory styles has Mateusz once more enticing everyone with his impressive mastery over art directions. This time around in Submachine 9, the ethereal sci-fi-inspired designs were exchanged for the mystical, spiritual, and religious architectures. Stones wedged within the walls and floors, cracks and growths littered their surfaces, totem and statues and ornaments and the likes sitting in open and corners, taunting and teasing our inquisitive curiosity. The entire Temple are rife with the remnants of ancient times, falling victim(?) as another part of Submachine’s mysteriously abandoned locations.

While such decision may be quite odd given how heavily interwind the series is with many science fiction tropes, the choices are rather inspired and fitting given the nature of the game itself for a few very good reasons I dare not to mention here. Each areas outside and inside the Temple are vividly haunting, serene, and menacing, appropriately given the atmosphere that the entire areas are of sacred value and not to be desecrated. Even many of the series’s hallmark difficult puzzles are crafted as if they’re part of the Temple’s ornaments and are gorgeous to look and interact with. Even the entire architecture serves immensely to the plot as you will find out why while descending deeper into its never-ending abyss.

The only criticism leveled against the game is that some of the main levels are too similar in term of design and construction, though they’re smartly differ from each other by uses of various elements and puzzles to keep you from being too lost in its labyrinth layout. Submachine 9 might delights or disappoints you depending on your preference of art styles, but it will leave you satisfied with how gorgeous the Temple is.

Score: 9.8/10

—————————

SOUND

Your ears will bleed in happiness for the acoustic and soundtrack of Submachine 9 are phenomenal. Not only the entire soundtrack ranks against the likes of series’ best in Sub_2, 4, 7, and 8, it could very well be the very best in series. The tunes continue the proud traditions of evoking ominously haunting and oppressive atmosphere, fitting so perfectly within the style of locations, and being marvelously memorable. What made this installment special is how extremely fitting the soundtrack is within the sequence of game and the emotions of plot so efficiently as the tunes blare and beat perfectly with your awes and shocks and dread.

Even the tunes are delight to listen as they are full of characters and also perfectly fits the style of the entire Temple. The richness and quality of soundtrack made itself into a unique kind of beast all of its own that elevates the whole game convincingly against the other critical darlings in its own series.

Thumpmonks has outdid themselves once again.

Score: 10/10

—————————

PLOT

You know those sounds raging across the internet lately?

MINDS BEING BLOWN.

Who knew that chasing after Murtaugh and Liz would reach toward something like this? Being the penultimate installment of the main series, Submachine 9 wastes no time revealing itself to answer many of our tantalizing questions and creating several new ones. At long last, the entire plot of Submachine are starting to be made clear, starting with a lone and seemly inconsequential note back in Submachine 1: the Basement. Details being scrounged and analyzed, theories are shattered and validated, and revelations being digested and debated. Submachine 9 absolutely leave almost no stones unturned, ambitious in its quest to make sure we know exactly or subtly what has happened, what are happening, and what will happens in Submachine 10: the Exit.

The only small criticism that some people may have against the game is that the story told in Submachine 9 has made the Submachine 7’s excitingly active plot rather pointless. Heck, they may feel that the entire series has slammed its brake and did a disservice to its own tale. In my personal opinions, I enjoyed the plot for what it is. While I may lament that the main plot may be neatly wrapped up as it is after experiencing exciting and active entries in Sub_4, 7, and 8, I understood and respect the decisions as what were found in the Temple have huge thematic implications in the entire series for the better.

The method and style of plot and its twists are absolutely fitting given the nature of the Temple location itself. Perhaps what may delighted or angered many of series’ devoted and diehard fans is that the biggest question have still yet to be answered: what Submachine really is? At this point in the entire series given that Mateusz has been very selective with how he choose to share with the players, we may never know the answer.

And yet, we still love the series for its mysteries.

Score: 10/10

—————————

GAMEPLAY

Submachine 9 does not disappoint. It kicks our asses and made sure we loved every agonizing seconds of it. The Temple may well be the hardest in series as it was clearly crafted for the expert PNC players. With very little hints and guiding arrows, we are left to our own devices and instincts as to where to go, what details to explore, and how to solve those puzzles? The series’ hallmark exploration are still here, this time bolstered by sheer immensity of the Temple itself, being the biggest in series. The backtracking were kept from being tedious thanks to strong art direction and smart level design. What elevates the gameplay is how the overarching plot of series works seamlessly within the game, using the items and puzzles themselves to progress the story and answer many of our questions. The puzzles are no slouch either, requiring your very best logic and observation skills to hatch open their solutions.

These requires some finely-tuned attention to details that not many players may have. Some of puzzles are rather difficult (or perhaps TOO difficult), forcing you to potentially hound after a conspicuously hidden item, room after room, before you either figured it out by yourself or resorting to walkthrough. I almost took the easy way out as few of the puzzles were particularly unforgiving given that it is easy to miss some of crucial details that may nudge you toward a solution. Also, secrets hunting is as strong as ever. You may wastes hours trying to find those little golden buggers and hated Mateusz for it. The set this time around are the most cleverly hidden yet.

Make no mistakes, Submachine 9 is a monster as it was meant to be at this point in the series. If you played this game first before any other games in the series, may Shiva has mercy on your poor foolish soul.

Score: 9.5/10

—————————

FINAL THOUGHTS

Submachine 9 has comes and gone, leaving behind trails of destruction that are our lofty expectations. Mateusz Skutnik has once again shattered them and rightly so, leaving the gap wide open for any and all hypes to shatter once more when the conclusive game, Submachine 10: the Exit, emerges from the depth of his mind to pen off one of the most well-realized, expertly-written, and finely-crafted PNC series of all time.

On my more personal notes, this is one of the best in series with Sub_9 ranking alongside Sub_2, 4, 7, and 8. No easy feats given the previous two games have constantly outdoing themselves and Submachine 9 has certainly outdid itself.

With styles.

FINAL SCORE: 9.6/10

Author: -AK-


Submachine 8, EzloSpirit’s review


(This review is also an article, entitled “Submachine 8: Well-Planned,” that I wrote for the next issue of my school’s newspaper. As such, its format is a little different from the standard format of in-depth reviews on this blog. It also has a different, sillier mood.)

Submachine, which has absolutely nothing to do with guns, is quite possibly the most renowned point-and-click series of the twenty-first century. It has been compared to the TV series Lost, with its incredibly complex and slow-progressed plot, its sense of “What is going on here‽”, and its incredible ability to make players—not to mention its unnamed, unseen protagonist—completely, totally, utterly, and redundantly lost.

Submachine is a point-and-click science fiction/puzzle series with elements of the escape genre that is primarily available for free online on the Adobe Flash platform through various Flash gaming websites. Its “basic” premise is that there is a network of places called submachines that was being explored by a team of scientists, most who went missing or died, under the leadership of a mysterious man named Murtaugh, who has the ability to create portals that can be used to travel to different places in the Submachine Network (or Subnet) but damage reality when created; because of this power, Murtaugh’s former colleagues somehow buried him alive in a lighthouse, but he managed to escape and start a team of scientists that would explore the Subnet, but unfortunately for them, Murtaugh went a bit crazy and killed a whole bunch of them and began searching for a way to pursue those who had buried him alive to take his revenge. (*wheeze* *wheeze* *wheeze* Whew! Sorry! I’m okay, now.) Confused yet? Don’t worry. That’s normal, no matter how many times you’ve played through the existing installments in the series. And…even with all of that having been established over the past seven games, it is still unclear what the goal of the protagonist is!

Few questions are answered, and an ungodly number of new ones are opened up, in the latest Submachine game, Submachine 8: The Plan, which was released on the official series website, Submachine World on September 29. The game begins after the protagonist has traveled far outside the Core of the Subnet via one of Murtaugh’s “Karma Portals” at the conclusion of the previous game (aptly subtitled The Core), and now he/she is…well, on a catwalk of some sort…somewhere.

The game ups the ante and brain-pain by introducing the Seven Layers. Apparently, the Subnet has seven layers of reality—seven different “dimensions,” if you will—so that there are seven completely different locations existing in the same place at the same time. These layers are navigated using an also aptly-named device called a Navigator that allows the protagonist to pass between them.

Sector 9 (whatever that means), which is where the protagonist has found him-/herself, is composed of a 9-by-9 grid of, well, game screens, and certain screens (or groups of screens) within a given layer are orphaned from the others. So how can they be accessed? That’s right: by passing to another layer, moving to the equivalent screen on the grid, and then passing back. Unfortunately, each consecutive layer is inaccessible until a device is activated in some way in each preceding layer. It’s not always so clear how to do this, but it doesn’t take too much effort…to figure it out; doing the activation itself is not such a simple matter.

Navigating the game is difficult enough. By the time the protagonist has access to all seven layers, you, as the player, will need to be familiar with the layouts of seven different areas and which layers should be visited to enable access to different screens in other layers. Meanwhile, you are picking up items and other things that will allow you to advance and eventually activate every layer device and then grant the protagonist access to a place in Layer 5 called The Temple, thus completing the game. (I couldn’t possibly explain it any better! Again, it’s like Lost; you have to actually play it to understand it as fully as is humanly possible!)

I fell in love with the Submachine series earlier this year, using walkthroughs to enable myself to actually progress through each frustratingly-puzzling game (in a good way) and see what happened next in the intricate plot. One of my favorite aspects of the series is its dark, foreboding atmosphere that makes you feel very much alone—there are no characters who are actually seen, as the games’ world is seen through the protagonist’s eyes—and therefore want very much to keep moving so you can maybe get closer to civilization of some sort. That atmosphere is as present as ever in The Plan.

This installment is a stand-out among its predecessors with regard to its gameplay; the Seven Layers hook makes for some headache-inducing puzzles and problems that make you work both the logic and memory centers of your brain more than any Submachine has before. As in the rest of the series, you really need to think outside of the box to advance, a staple of Submachine that almost defines it.

While it does little to advance the plot like the past four games have done, Submachine 8 preserves the series’ sense of wonder and awe. Mateusz Skutnik, the mastermind behind everything Submachine, has such a wild and intelligent imagination that I would be lying if I said that he couldn’t possibly be some kind of genius. I would never have the capacity to create such abstract, clever tasks, and while games have used the parallel universes thing almost to the point of cliché, to include an astonishing seven parallel “universes” was a very bold move, and it is done seamlessly.

I can’t write a review about a Submachine game without mentioning the music, called “ambients” by the creator and the game’s fanbase. Once again produced by New York-based group Thumpmonks, The Plan’s music is appropriately haunting and mysterious. Very ambient!

This eighth game marks the first time that a separate “HD” version of the game has been released alongside the usual free browser version. This version of the game can be played offline and in full screen, and it also includes the ability to save one’s progress, which is absent in the browser version. Possibly best of all, the download comes with the official nine-track soundtrack in MP3 format! The HD version costs a measly $2, so if you like the game, purchasing the HD version should have little impact on your wallet, and it helps Mr. Skutnik fund his next game, which will probably be Submachine 9: The Temple, due for release next year! (Then, again, The Plan was originally slated for release in 2011.)

If you like surreal, mind-bending, puzzling games, then I can not recommend the Submachine series to you any more highly, and that, of course, includes The Plan. If you are a sci-fi nerd like myself or a brain-teaser/puzzle enthusiast, even if you are not much of a gamer, you will also most likely appreciate the masterpiece that is Submachine 8. The game continues the mystery and subtle suspense that the first seven games and four spinoffs so perfectly established. The Seven Layers mechanic is executed fantastically. And the atmosphere is beautifully haunting. So what are you waiting for? Go play Submachine 8: The Plan right now! Actually, wait, no. Like with Lost, you should probably start at the beginning! Submachine 1: The Basement is available on the series website, along with the rest of the games. Check them out at Submachine World!

Gameplay: 10/10
Design: 10/10
Graphics: 10/10
Replay Value: 9/10
Soundtrack: 9.5/10

Overall Grade: 9.7/10 (A+)

Author: Ezlo


Submachine 9, english walkthrough


General Information

• Area names are completely my own.
• Don’t forget to put down items once you are done using them. If you still have an item in your hand, you cannot travel or activate other things.
• It helps to have played Submachine 8 since you begin right where that one left off.
• Once you go through the tunnel, pay close attention to the shape of the structure you are inside. Yes, it is a pyramid.
• There are 5 secrets in the game.
• Note: Your inventory is limited, so use items as soon as you can to keep from overloading and being unable to pick up needed items.

The Balcony

• You begin on a wooden structure on what appears to be a balcony. You should have the hammer and the controller from Submachine 8 in your inventory.
• Go left.
• There is a plinth here. When you click on it you get some text, “The light of Shiva drawn Murtaugh to live in the lighthouse.”
• Hit exit and go left.
• This is the end of the balcony. To your left is a wall. Note the strange symbol on one block of the pyramid-like wall.
• Go right twice to the wooden structure, then right once more.
• Here is another plinth. This one says, “The light of Shiva drawn Elizabeth to leave the lighthouse.”
• Hit exit and go right.
• You are now facing what looks like a fountain filled with glowing green water.
• Look at the right side of the fountain, there is a spigot which is sending the glowing green water into a crack on the balcony.
• Go right.
• You are now facing a wooden door surrounded by tree roots.
• Go right.
• This appears to be the right edge of the balcony. There are two stone elephants here, as well as a brass rod and a small brass box to the left of the elephants.
• Take the brass rod.
• Use the brass rod on the brass rectangle to the left of the elephant. Once the rod is inserted, click it to move it to the right.
• Go left. Notice that the door is now open.
• Go forward into the door.
• You are now inside the structure. The way out is to the left. This room has two brass pipes going from the floor upwards.
• Go right.
• You are now facing a room with a door. If you go through the door you will find a room that is mostly in shadow. On a low structure is a brass bowl.
• Click on the left side of the screen to exit. You should now be back at the room with the door.
• Go right.
• This room has a small structure with another brass bowl on it. Go right.
• This is the farthest you can go in the structure right now. In this room is a window with a brass jug in it. Take the jug.
• Go left four times until you are back on the balcony, then go left once to the fountain.
• Use the brass jug on the spigot on the right side of the fountain to get some karmic water.
• Once you have the karmic water, go right to the door, then through the door.
• Once through the door go right twice to the room with the brass bowl. Use the karmic water on the bowl.
• The karmic water will cause a strange structure to grow. Put the brass jug back in your inventory then click on the glowing structure in the top middle to get a green cog wheel.
• Go left to the room with the door, then go through the door.
• Now use the karmic water on the brass bowl in the shadowy room.
• This time the structure is very different. Look closely.
• Notice the three squares at the bottom? The middle one has a symbol like the stone on the pyramid wall.
• Place the green cog into the horse-shoe like structure and it will form a key.
• Click on the bottom of the key and it will swing, causing one of the squares to move and showing a new path in the structure to the left (this represents the pyramid-like wall on the left side of the balcony).
• Go left three times to the balcony, then left five times to the pyramid wall.
• Note the opening in the wall where the strange symbol used to be.

Inside the Pyramid (Red and Blue)

• Go left into the opening in the pyramid wall.
• You are now in a tunnel. Go left three times and you emerge in a room with two brass pipes.
• Go left.
• You are now in a room with a strange structure, it looks like a fire hydrant with a giant hoop through the top. Note that all of the rooms are red.
• Go left.
• This room has three candles, a pipe on the wall, and another pipe with a ring in it on the left.
• You can go no further left right now. Click on the ring in the left pipe and it will come down, forming a ladder.
• Go up the ladder.
• Go right and you are in a room with a sharply sloping ceiling. There is a brass scarab on the floor, take it.
• To the right is a small square of light on the dark sloped ceiling, click on it.
• This is a shaft that goes up and to the right, but at this point we can’t go any further. Click on the left side of the shaft to go back to the room.
• Click left to go back to the top of the ladder, then left again.
• There is another brass bowl here, along with shards of blue stuff on the floor.
• The pipe on the wall looks like another ladder structure, but there is no obvious control to open it.
• Use the karmic water on the brass bowl. It will form another pipe with a ring like the one downstairs.
• Click on the ring to activate the ladder, then go up.
• You are now in a blue space at the top of a ladder.
• Go left.
• This is the top of another ladder, but there is a grating over the hole going down.
• There is a porthole on the left wall, and a part of a stone key on the ground. Take the part and go right.
• Once you are back at the top of the ladder you came up, go right again.
• There is a sharply sloping roof here, and a small brass chest.
• There’s nothing you can do here at this point, so go left to the top of the ladder.
• Go down to the red area, then go right.
• You should be back at the top of the red ladder. Go down.
• Go right and you are back at the thing that looks like a fire hydrant with a hoop through it.
• Note the small circle on the post of the hydrant thing.
• Place the brass scarab on that small circle and the ring will close, giving you part of a stone ring.
• Place one of the stone key pieces on the other to form a complete key.
• Go left to the ladder, then up. Then go left and up again to get to the blue area.
• Go left to the ladder with the grate. Remember that porthole on the left wall?
• Use the stone key on the porthole and the grate will lift up, allowing you to travel down.

Inside the Pyramid (Red)

• Go down the now open ladder.
• You are back in a red area. Note that the ladder is broken and you can’t get back up.
• There is a ladder rung on the floor, take it.
• Also note the small device like the others that held brass bowls. This one is bare.
• Go left.
• This area has another one of those hydrant things with a ring. There is a porthole on the left wall and three candles as well.
• Look closely at the wall above the hydrant thing, there is a small square patch near the ceiling.
• Hover your cursor over this patch and you will see llllOll.
• Now hover your cursor over the controller in your inventory. If you haven’t been pushing buttons you should see Ollllll.
• If you remember from Submachine 8, the O stands for the active button on the controller.
• What you want to do is push the button on the controller so that it matches the pattern of the square on the wall.
• That means pushing the left, third from the top button,
• If you pushed the correct button the hydrant will disappear.
• In its place will be a pole with a brass key on top. Take the brass key.
• Now place the brass key in the porthole on the left wall.
• The left wall will lift up. Go left.
• You are now in an area with the ceiling sloping in from the right. There is a small opening in the sloped ceiling on the left, click on it to look inside.
• This is another shaft, going up and to the left. Click on the square on the right to go back to the room.
• On the floor of the room is a brass bowl, take it.
• Also in the floor is a hole, click on it to go down.
• You are now below the room with the slanted ceiling. There are three brass blocks here which form stairs up to the slanted ceiling room.
• Go back up.
• Go right twice to the room with the broken ladder.
• Place the brass bowl on the block and use the karmic water on it.
• This fills in the ladder so that you can go back up. But let’s explore further instead.
• Go left twice to the room with the hole in the floor, then go down.
• In the room with the brass blocks, go right.
• There are three candles here, white drapes, and a ladder going down. Go right.
• There are more draperies here, and a pedestal with a covered brass bowl. Click on the cover to open it and take the brass sphere.
• Once you’ve taken the sphere, fill the bowl with karmic water. Once the device grows click on the center to take the karmic seal.
• Go right.
• This is as far right as you can go. On the floor is a chest key, take it.
• There’s another of those mysterious squares on the wall below the candle, hover your cursor to see lllllll.
• We can’t reproduce that for the moment, so let’s explore some more.
• Go left twice to the room with the candles.
• Click on the ladder on the back wall (to the left of the candles) to go down to the next level.

Inside the Pyramid (Gray)

• You are now in a gray area. Notice the wire going across the top of the scene. Go left.
• You are in a room with a hole in the floor. The hole is covered by a cage which is attached to a wire that goes to a pulley near the ceiling and goes right (into the next scene).
• Go left.
• This room has two pyramid shaped heaps on the floor. There is also a brass plate of some sort on the wall Go left.
• This is as far left as you can go. You are now in a room with a sloped ceiling. Notice the small hole in the sloped ceiling on the left.
• Click on the hole to see yet another shaft going up and to the left. Inside the shaft is a brass tile, take it.
• Leave the shaft, then go right three times back to the ladder.
• Go right.
• The wire continues across the top of the scene. However, you appear to be unable to move any further right, as the way is blocked by what looks like a ceiling of tiles and a statue.
• You actually can move further right, just click on the far right of the scene above the tile roof.
• You are now on the other side of the tile roof. There is another statue here, and the wire above keeps going to the right.
• Go right.
• Here is where that wire ends, above a blue figure. To the right of the blue figure is a lever which doesn’t appear to do anything.
• To the left of the blue figurine is a small gray stone. Hover your cursor over the stone and you will see OllOllO.
• Note: if you push the buttons indicated by the gray stone, the blue figurine changes.
• Go right.
• This is as far right as you can go. There is a brass statue here.
• Look closely at the base of the statue, there is another brass tile leaning against the base. Take the tile.
• Go left.
• Let’s get back to the blue figurine. If you push the second from the top left button on your device, the figurine becomes a brass pole with a bowl on top. If you push the left bottom button, it becomes a stone pillar. Push the button that changes the device to a brass pole with a bowl.
• Use the karmic water on the bowl and a green device will appear.
• The lever is still useless, however. Push the button that changes the device to a stone pillar (left bottom button) and use the karmic water on the stone bowl at the top of the pillar. A second green device will appear.
• Now push the button that makes the blue device come back (top left button) and push the lever.
• Go left four times to the room with the cage. The cage is now up and the hole in the floor is open.
• Go down.
• You are now at the bottom of a brass ladder/shaft, still in the gray area.
• Go left.
• This room has debris and three candles. Go left.
• This room has what looks like a door on the back wall. On the door is another of those squares.
• Hover your cursor over the square and you see lllllOl.
• Hit the button on your device that matches this, the third down on the right, and a brass wheel of some sort appears on the wall.
• Go left.
• This room has a sloping ceiling. On a brass plinth is a lever handle, take it.
• Go right three times to the ladder, then go right.
• There is another one of those strange statues here. Leaning against the right side of the statue is a stone tablet, take it.
• Go right.
• You are at what looks like a window into the tiled roof of a temple. Click on the window.
• Inside this temple is a curved brass pipe. There’s nothing more to do here, so click on the open window on the left to leave the temple.
• Go left four times until you reach the room with the brass wheel.
• You should have two brass tiles at this point. Notice that each one is a segment of a circle.
• You can try to fit your two tiles into the wheel and they lock into place. Looks like we need to find the other two tiles.

The Brass Wheel and the Brass Tiles

• Go right twice to the ladder and then up.
• Go right to the ladder, then up.
• You are now back in the red zone. Go left.
• This is the room with the brass blocks, go up.
• Once you are up, go right twice to the room with the ladder. The karmic water should be forming the ladder.
• Go up.
• You are back in the blue area. Go right twice to the room with the sloped ceiling and the brass chest.
• Use the chest key to open the chest and get another brass tile.
• Go left twice to the ladder and then down.
• Go left twice and then down through the hole.
• Go right once and down the ladder to the gray area.
• Go left twice until you are at the room with the red pyramids and the brass plate on the wall.
• Does the shape of that plate look familiar?
• Use the stone tablet on the brass plate.
• A small ladder appears, use it to go up.
• You are in a room with a sloped ceiling. There are three candles here and the last brass tile. Take it and go back down.
• Go right to the cage, then down through the hole.
• Go left to the room with the brass wheel.
• Place the last two brass tiles in the wheel.
• The floor will drop into stairs going down.

The Lower Levels

• Go down the stairs.
• You are at the base of a set of stairs.
• Go left.
• There is a stone bust on a brass stand. Click on the bust to get a stone eye.
• Go left.
• You are in a room with a sloping ceiling. You can see the faint light of another one of those shafts on the sloping ceiling.
• Click on the shaft to see inside.
• Doesn’t appear to be anything there. Go right back to the room, then right twice to the base of the stairs.
• Go right.
• There is a stone plinth here. Click on the top to get some of Murtaugh’s story.
• Go right.
• This room has three candles, and a wooden window to the right. Click on the window to go right.
• You now appear to be in a bell tower. There are stairs going down, go down.
• The spiral staircase continues down. Go down.
• At the base of the staircase is a brass bowl, take it.
• There is a hole in the wall to the left of the stairs, go left.
• We can’t go any further here, so go right to the stairs.
• Go up the stairs twice to the bell tower.
• Go left through the window.
• Go left to the stairs, then up.
• Go right four times to the window into the temple.
• Go into the temple window and you will once again see the curved pipe.
• Place the brass bowl at the end of the pipe, then use the karmic water on it.
• The karmic water will create a walkway going right. Go right.
• Go right again and you will come out a window on the other side of the temple roof.
• Go right. There is another statue here.
• Go right. There are wall panels here and debris. Go right.
• There is a small opening in the back wall that appears to go down. Go right.
• There is a brass circle on the wall with an Egyptian eye. Go right.
• This is as far right as you can go as indicated by the sloping wall. There is a brass base here.
• Go left twice to the place with the opening in the back wall. Go through the opening to go down.
• You are in an area with a brass pole. There is a hole in the wall with the ladder leading back up.
• Go right.
• There is a candle here, and another of those squares. When you hover the cursor it says, “Broken beyond readability.”
• Play with the device and see that when certain buttons are pushed some brass devices appear.
• Push the right top button and a brass device appears that is bent to the left. Notice the large circle at the end.
• Place the karmic seal in the large circle and the device will stand up.
• Go right.
• There are more candles here, and a stone wheel on the floor. Go right.
• This is a room with a sloping roof. There is another one of those Egyptian eyes on the wall. There is a strange device on the floor that goes into a shaft in the roof and down into a hole in the floor.
• Place the brass lever on the device. Once the lever is on click again to activate the device.
• Go left three times to the hole in the wall.
• Go left.
• More candles, and a window on the left wall. Go left through the window.
• We’ve hit another bell tower. Did you notice that you can ring the bell with the hammer?

The Bell Tower Levels

• Go down four times from the bell tower until you finally reach the bottom.
• Go left and you will find a statue with some brass machine parts around the base.
• Go left and you will find another statue.
• Go left and you will find a large red landslide that fills up a doorway.
• Go left again and you will find another plinth with yet another bit of Murtaugh’s story.
• Go left and you will find a grate in the landslide that goes down. Ignore that and go left.
• Buried in the landslide is another brass bowl, take it.
• Go right six times to the staircase, then up four times to the top of the bell tower.
• Go right four times until you are at the scene with the stone wheel.
• Place the brass bowl in the stone wheel.
• Use the karmic water on the bowl.
• This produces a lever that can either be to the left or right. Move it to the right. Note: this lever works an intersection of pipe way down in the Bell Tower levels.
• Go left twice to the hole in the wall, then go up.
• Go right and you will see a rope hanging from the ceiling in the space that has the Egyptian eye. Click on the rope to go up.
• You are in a room with a sloping ceiling. This rope and pulley system connects to the one where you placed the lever.
• Go left.
• There’s a strange stone figurine here on a brass base. Click on the stone figurine to get a stone eye.
• Go right to the hole, then down.
• Go left four times until you hit the temple window.
• Go left through the temple and out the other side. Keep going left until you hit the brass ladder/cage thing.
• Go up.
• Go right five times until you hit the gold statue.
• Note that the statue now has green earrings. There is a small circle in the middle of the statue’s “forehead”, click on it to get a secret.
• Go left five times to the hole, then go down.
• Go right and keep going right through the temple until you come to the hole in the wall.
• Go down, go left until you get into the bell tower, and then go all the way down.
• Go right. There is a device here, it looks like it needs two small circular items and there are two handles, but it doesn’t work.
• Go right.
• There is a grating on the floor here. Go right.
• Progress halts here as there are bars to the right. Looks like we need a key.
• Go left eight times until you hit that area with the red debris and the grating going down.

The Tombs

• Click on the grating to go down. Go down again.
• At the bottom of the pipe go left twice.
• You are now at an intersection. Note: If you pulled that green lever to the right the intersection goes up. If you pulled it to the left, it goes down into nothing.
• If the intersection is going up, go up.
• Go up again and you are in a secret room. There is a small secret on the floor to the left of the pipe opening.
• Go back down twice and go left twice.
• Go up twice and you are finally out of the pipe.
• There is an opening in the wall ahead of you. Above the opening is a plaque, hover your cursor over it to discover that this is Murtaugh’s tomb.
• Go forward.
• Here in the opening, you can go right. Do so and you will find a gold statue of Ganesh (it’s a god that looks like an elephant).
• Notice that Ganesh is holding a brass bowl. Use the karmic water on the bowl.
• The karmic water creates a clickable portal. Click on it to find a secret blue room.
• In the blue room there is a small device that looks like a mantel clock, click on it to open it and get a brass key.
• Click on the brass circle to get back to Ganesh.
• Go left from Ganesh and left again. Here is another plinth with more details about Murtaugh.
• Go right, then go forward to look at Murtaugh’s tomb.
• Use one of the stone eyes on the large circle above the head of the figure on the tomb. This will cause the tomb to open.
• Inside find the golden seal of Murtaugh, take it.
• Back up twice until you are in front of the pipe where you came in.
• If you go left twice there is a statue of a calf. There is something funny about the base, but there is nothing you can do about it right now.
• Go right twice back to the pipe and the tomb, then go right again.
• The way is blocked by red debris, but there is a brass bottle sticking out. Click on the bottle to open it.
• Use the karmic water on the open bottle and a green device will grow. Click on the upper right of the device to get a karmic seal.
• Go left, then down the pipe twice to the bottom. Go right four times then up twice to get out of the pipe system.
• Go right five times to the stairs, then right again to that odd device.
• Place Murtaugh’s gold seal in one of the prongs on top of the device, and pull the lever.
• Go right twice until you hit the bars.
• Use the brass key on the brass circle on the wall to open the bars.
• Go right.
• You are in an empty hall. Go right twice more to find the tomb of Elizabeth.
• Go right from the tomb to find another plinth and another part of the story.
• Go right again and you will find another stone statue. There is a button on the base of the statue, push it.
• Go left twice to the tomb.
• Go forward into the tomb. To the right is a gold statue. We can’t do anything here yet.
• Go left twice to a brass circular object. Notice the smaller, open circle halfway down the object’s base.
• Place the brass sphere in that open circle and the larger circle opens up, revealing another clickable device.
• Click on the larger circle to find another set of secret blue rooms. Go right.
• Here you will find a climbing rope and a circle, take them.
• Go left and click on the circle to go back to the tomb.
• Go right.
• Go forward, then use the other stone eye to open this tomb as well.
• When the tomb is open get the golden seal of Elizabeth.
• Back up twice and go left five times to the device with the two prongs.
• Place Elizabeth’s seal in the device and pull the lever.
• Go left twice and you will see that the statue of the woman now has an open base. You can go in and down to another area.
• Go left four more times to the red debris and the pipe opening.
• Go down twice, left four times, then up twice.
• Go left to the statue of the calf and you will see that the base is open, revealing a secret. Take it.
• Go right twice, down the pipe, right four times, and up again.
• Go right to the bell tower stairs, then go up.
• Go right four times to where you placed the karmic seal. It may be floating in mid-air depending on what position your device buttons are in.
• Pull up your device, then push the third down from the top left button to reveal another brass device, this one leaning to the right.
• Place the karmic seal in the device and it will straighten up, merging the two seals.
• Now pull up your device again and push the third from the top right button to bring out another device. This one has an opening in the base with a wheel, click on it (valve).
• Go left to the bell tower, then all the way down.
• Go left to the statue, and click on its base.
• Go down four times until you emerge out the bottom.

The End

• You are now in a sort of open cage balcony.
• There is a brass pole on the left with a small circle on top, place the valve wheel on it.
• Click on the valve wheel to turn it and a hook emerges.
• Place the climbing rope on the hook. Once the rope is in place go down.
• Enjoy the long trip down the goddess. When you reach the end of the rope, go down again to hit the bottom.
• Go left from the base twice to find another plinth with another part of the story.
• Go right twice back to the base of the statue, then go right again.
• There is a device here with a glowing green circle. Go right.
• There is a device here that arches to the right. Go right.
• The other end of the device is here. On the base is a square. Hover the cursor to see lOlOlOl.
• Go right. There is a small stone base here, with another square. Hover the cursor to see llOllll.
• Use your device to push the proper button (left side, second from the top) to match the stone base.
• A wedge of scenery appears with a portal in it. Click the portal.
• You are now in a secret room. Click on the device on the right to open another device on the top.
• Inside are three glowing blue gems (wisdom gems). Take them.
• Hover your cursor to the left to find the portal and click it.
• Go left to the brass device that had the code lOlOlOl on it.
• Pull up your controller and hit the top right button, then place one of the wisdom gems on top of the device.
• The gem will disappear.
• Pull up the controller and push the second from the top right button. Place the second gem.
• Push the third from the top right button, then place the third gem.
• Go left.
• The dome on the left device has now opened, take the button sitting on top.
• Use the button with your controller to fill the last slot.
• Pull up the controller and hit the new button (right, bottom).
• Follow the energy trails left nine times until you find the beginning, a circle.
• Click the circle.
• See you at Submachine 10: The Exit!

author: Grinnyp on jayisgames.com


Submachine 9, Jayisgames review


That little prickle on the back of your neck… it’s a combination of wonder and apprehension, and nobody mixes a feeling of awe and the ominous better than Mateusz Skutnik, especially when it comes to his beloved Submachine games. The series has a deep mythology and positively rabid fanbase rife with theories as to the meaning of it all, but now that Submachine 9: The Temple has finally arrived, will we get more answers than questions? This time, you awaken in what looks like the ruins of a strange civilization, only some seemingly busted electronics and a hammer to your name.

As usual, click to interact. Items you can use will appear in your inventory at the bottom of the screen, where you can click once to pick them up, and then again in the game wherever you’d like to try to use them. The cursor will change to highlight interactive zones or area transitions, but that’s all the help you’re going to get. You’re on your own. For many fans, that lack of direction is exactly what they crave. It adds to the air of mystery and the feeling of genuine discovery as you explore. Every bit of progress feels like solving a piece of that mystery, and it’s not the sort of atmosphere many other games have even come close to achieving. Of course, that also means when you’re stuck, you’restuck, since the game isn’t going to offer you a whole lot help. It’s up to you to pay close attention to your surroundings and learn how to both spot clues as well as interpret them.

Analysis: Come on, guys. It’s a Submachine game. Of course you should play it. The Temple, like its predecessors, marries the otherworldly with the mechanical in its design, encouraging you to poke and prod at everything you see. What often looks baffling in its construction always reveals its own logical use when you start putting the pieces together and learning the way your new realm works. The Temple’s construction feels a lot more linear in terms of the way its laid out compared to locations in other games, which makes finding your way around a lot easier. Solving the puzzles? Not so much, but not in any fashion that makes them obstinate or unreasonable. You may not be given a whole lot of clear direction or obvious hints, sure, but the “ah-ha!” moments are always there if you look hard enough, drawing you onward. Each time I thought I was stuck I would notice something new to try, and as a result, I never felt frustrated. Just, y’know. A little dumb.

Though it starts out comparatively easy, the deeper you go into The Temple, the more complex it gets, and mercifully this installment is lighter on backtracking than others have been. You’ll still have to do a fair amount of wandering, since it won’t always be apparent that something you’ve interacted with has changed something elsewhere. The visual design makes it fairly easy to pick out items of interest from the backgrounds, but you might still have to use the ol’ hot-spot-cursor-wiggle-waggle to find a thing or two. It’s also a big game, with a substantial amount of areas to explore that seem to just sprawl out more and more, especially later on. There are hidden doors, secret mechanisms, and, yes, some plot payoff as well. It really is one of those rare games that will have you going “WHAT DO YOU WANT FROM ME” one moment, and feeling like a magnificent clever pants the next when you finally figure it out. Beautiful, creative, and sneaky in the best possible way, Submachine 9: The Temple isn’t just a great Submachine game… it’s a great game, period.

Author: Dora


Rewolucje 9, pierwsze szkice albumowe


r9_szkice_krk

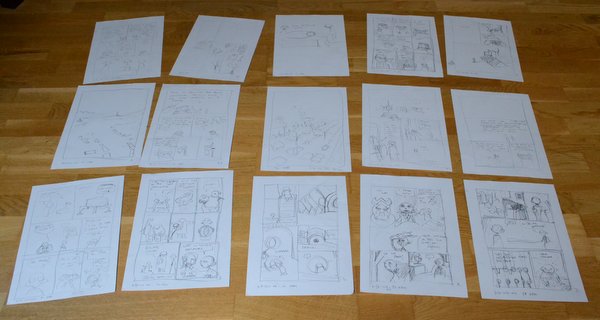
Słowo się rzekło – kobyłka u płota. Droga z Krakowa do Gdańska długa, to i kilka szkiców wpadło do worka. Piętnaście, tak dla równego rachunku. Jest realna szansa że w tym roku zdążę przed MFK. Tylko proszę się nie przypatrywać za bardzo, gdyż SPOILERS.


Rewolucje 9, ground zero…


rew_9_pierwsze_szkice

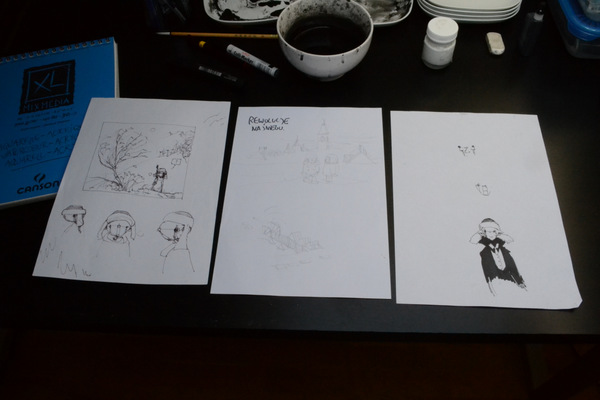
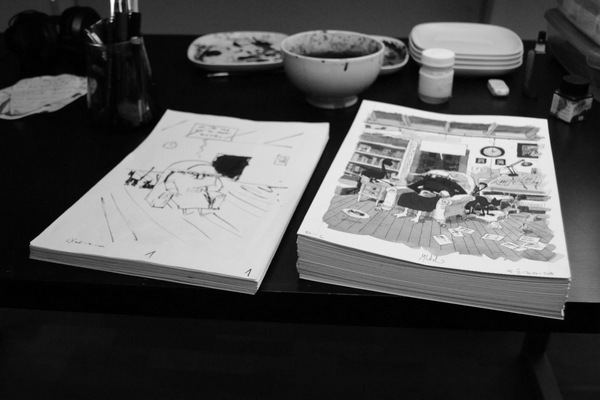
Jak to się mówi, z deszczu pod rynnę, tylko że w tym przypadku to bardziej z deszczu na pustynię. Podczas gdy do malowania poprzedniego albumu (Blaki Czwórka) miałem wymyślone, rozrysowane, zakomponowane i naszkicowane wszystkie plansze, to teraz, do nowych rewolucji (Rewolucje pod Śniegiem) mam tyle, ot, co na powyższym zdjęciu. Trzy zakurzone karteluszki sprzed lat. Cała reszta istnieje tylko w mojej głowie. Dobrze że zbliża się długa podróż pociągiem, będzie okazja żeby to wszystko wypluć na papier w formie szkiców.

p.s. – tutaj efekt tej podróży.


Blaki 4 finishing timestamp


Before:

.

After:

blaki_4_po

I know that 46/46 has a nice, romantic ring to it, but I think that 60/43 sounds good too. This one went faster because it’s black and white and was fully sketched out before the actual painting begun. Nevertheless, those were 43 testing days. I found out that those 24 hour comics challenges gave me much more than just a small comic book done in a day. Namely: endurance and mental toughness. I remember in the past I was marking pages whenever they were done in one day (I’d write 1dw on them, meaning one-day-work). Now it’s kind of given. One page daily is bare minimum. And it all seems to be easier after those 24h sessions. Strange how it  all goes.

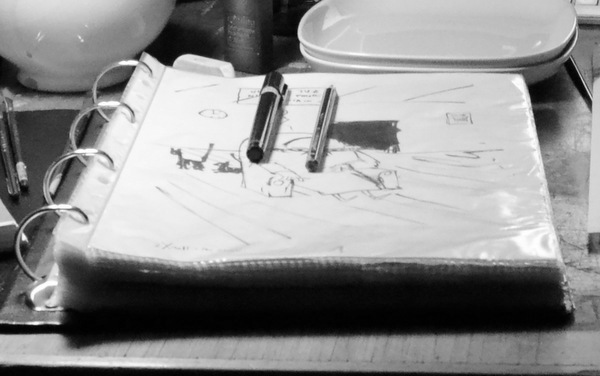
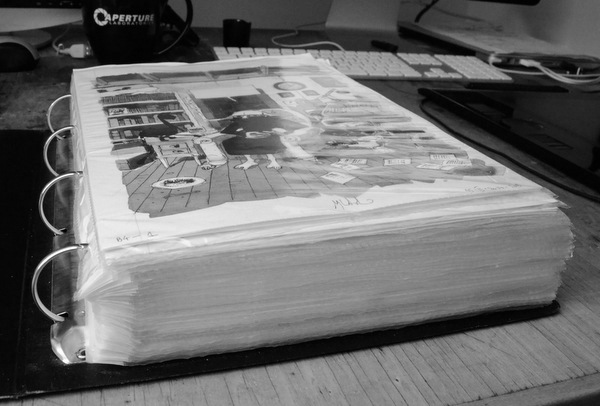
One more thing: this time, since I had complete sketch of the entire album I decided to keep those sketches instead of throwing them away as usual. The time will tell whether this was an important move from the standpoint of history of comic books (spoiler: it wasn’t). Here they are anyway, compared to the volume of the actual book:

blaki_4_szkic_plansze


Blaki inking


blaki_manga_1

blaki_manga_2


The Times they are a Changin’ (again)


mochi_end

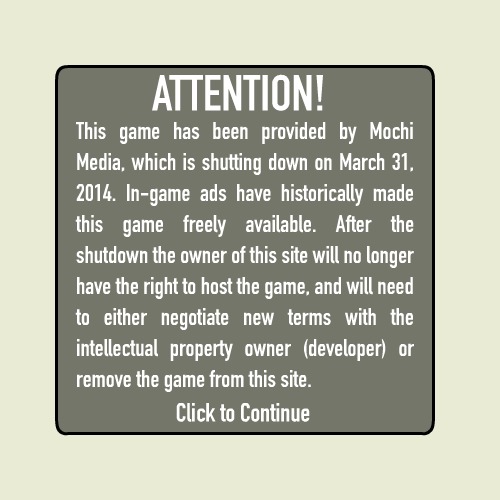
If you’ve been playing my games lately, you probably came across this confusing message. Let me explain what’s happening and if you have to be worried that my games are going away.

Short answer:
No, you do not have to worry about anything. My games aren’t going anywhere, this matter is completely irrelevant to the games. You can sigh in relief.

Longer answer:

(more…)


Submachine 9: the Temple


sub_9_main_screen

play this game

walkthrough: video | english | spanish

reviews: jay is games | -ak- | esensja


« Previous PageNext Page »