Submachine 8, review on zagadkanadzis.pl
September 25, 2012
Wreszcie, bo po dwóch latach oczekiwań, światło dzienne ujrzała ósma odsłona gry z serii Submachine. Dla osób niewtajemniczonych, Submachine jest przygodową flashową grą typu „point and click”. Autorem jest Mateusz Skutnik, znany również z innych aktywności artystycznych.
Submachine jest znana na całym świecie, a ósma część była chyba najbardziej wyczekiwaną z całej serii. Po rewelacyjnym i niezwykle klimatycznym Submachine 7: The Core, trudno było sobie wyobrazić, co jeszcze autor może mieć w zanadżu.
Sumbachine 8: The Plan nie rozwija znacząco fabuły (przynajmniej takie gracz może odnieść wrażenie po ukończeniu gry). Znajome są także efekty dźwiękowe oraz interfejs użytkownika. Na tym jednak kończą się rzeczy nam znane. Submachine po raz kolejny zaskakuje i wprowadza wiele nowych elementów i pomysłów.
Pierwszą nowością jest możliwość zakupu gry. Do wyboru mamy wersję darmową – znaną z poprzednich odsłon – niewielkich rozmiarów aplikację przeglądarkową, okraszoną reklamą. Druga opcja jest o wiele ciekawsza. Mianowicie możemy zapłacić $2, które autor przeznaczy na rozwój kolejnego projektu i cieszyć się pełnoekranową wersją offline wraz z dołączonym soundtrackiem.
Grę rozpoczynamy na swojego rodzaju „pomoście” dryfującym w przestrzeni, otoczonym wszechobecnymi światłami laserów. Pierwsze skojarzenie jest takie, iż znajdujemy się w głębszym wymiarze świata Submachine, opartym na warstwach, dokąd rozpoczeliśmy podróż na końcu poprzedniej części gry (monitor przedstawiający warstwy). Już na samym początku znajdujemy nowe tajemnicze urządzenie, które pozwala nam na podróżowanie pomiędzy warstwami/wymiarami. Występuje tu pewna analogia do portalu, którym poruszaliśmy się pomiędzy wymiarami w poprzednich częściach. Urządzenie może kojarzyć się z pilotem od telewizora, zawiera przyciski, które reprezentują kolejne warstwy świata. Niestety nie możemy nic więcej powiedzieć na jego temat, ponieważ jest kluczowym elementem rozgrywki, a umiejętne jego używanie pozwala na ukończenie gry. W trakcie przemieszczania się po świecie gry odnajdujemy (znane nam z poprzednich części) notatki – przybliżające fabułę oraz schematy – pozwalające na rozwiązywanie łamigłówek. W przeciwieństwie do siódmej części, autor postawił na urozmaicenie rozgrywki. Tym razem poruszamy się po wymiarach zupełnie różnych, które nie są spójne wizualnie. Lokalizacje są bogate w detale i dobrze kreują klimat całej rozgrywki. Łamigłówki natomiast wydają się być bardziej złożone niż dotychczas. Może dlatego, że elementy potrzebne do ich rozwiązania zostały sprytnie rozrzucone po wszystkich lokalizacjach. Na początku przygody z Submachine nietrudno o dezorientację, a wszystko to dzięki zupełnie nowemu podejściu autora do tej części gry.
Podsumowując, Submachine przedstawia nam realizację bardzo udanego pomysłu na przygodową grę logiczną. Rozwiązywanie kolejnych „układanek” daje bardzo dużą satysfakcję, a pozytywne doznania potęgowane są różnorodnymi i ciekawymi, a zarazem bardzo przemyślanymi lokalizacjami. Szczerze zachęcamy do zakupu wersji „HD”. W zamian dostajemy około 3h unikalnych doznań artystyczno-łamigłówkowych. Jednocześnie trzymamy kciuki, aby zapowiedziana na rok 2013 dziewiąta część gry, tym razem została ukończona na czas ; )
Rewolucje 7; recenzja na independent
Rewolucje. Z morza we mgłę.
Rysowanie zaczął 15 czerwca. Dokładnie 30 lipca Mateusz Skutnik ukończył ostatnią planszę. Planszę z numerem 46. Stało się to po 46 dniach malowania. Efekt? Siódmy tom cyklu „Rewolucje” – przechodzi najśmielsze oczekiwania.
Skutnik chyba jeszcze nigdy nie malował aż tak pięknie. Do tej pory kreując „Rewolucje” ograniczał się swoimi scenariuszami. Gdy jednak do pisania kolejnych tomów zaprosił Jerzego Szyłaka, nie miał już wymówki, że czegoś nie narysuje. Ten „wyciska z rysownika siódme poty, zaludniając plansze miejscami, zdarzeniami i postaciami, o których narysowaniu nawet mi się nie śniło w tamtych czasach. Sprawa jest prosta – rysownik który sam wymyśla sobie scenariusze sam siebie wciska w przytulny kokon swoich umiejętności, rysuje tylko to, co umie i co mu relatywnie łatwo wychodzi. Jerzy Szyłak zagląda do tego kokonu i mówi – ej, panie, wyłaź pan – narysuj mi to. I to. I to…” Już tom „Na morzu” – szósty z cyklu – wyróżniał się od poprzednich rozmachem, z jakim został zakomponowany – w efekcie hitchcockowski scenariusz rozrósł się na blisko 90 stron. „Rewolucje: We mgle” to kolejny, ogromny krok do przodu. Wprawdzie nieco skromniejszy jeśli chodzi o liczbę plansz, ale za to znacznie „gęstszy”. Patrząc na gotowy album naprawdę nie chce mi się wierzyć, że wystarczyło mu zaledwie 46 dni do jego ukończenia. Panie Mateuszu! Szacunek!
Autorzy mówią. że nowy tom „Rewolucji” powstał podczas podróży pociągiem w… 2004 roku – Skutnik przyznaje, że jednak dopiero teraz „poczuł się na tyle silny w łapie, żeby zaatakować ten scenariusz.” Rzucane, luźne pomysły Szyłak zmontował w jedną całość. Cholernie spójną, gdzie wizja budowania w centrum miasta pasaży handlowych – takich z wielkimi, oświetlonymi witrynami wystawowymi – szybko przeradza się w inną wizję, wykreowaną przez hipnotyzera z Litwy, niejakiego doktora Edmondantesa. Dobrze przeczytaliście. Siódma rewolucja jest rewolucją w umysłach, która dokonuje się z chwilą pojawienia się nad miastem złowieszczej mgły, z której wyłaniają się słonie, zwiastujące nadejście cyrku braci Fellini (a taki żart). I choć sekretarz w jednym z kadrów mówi: „Cyrk! Nie lubię cyrku… To rozrywka dla głupców, prostaków, kobiet i dzieci”, to wraz z wizjonerem od pasaży – radcą – dają się w tą zabawę wkręcić. Hipnotyzer oczywiście okazuje się być kimś innym, niż się podaje, a rozwiązanie zagadki przynosi pewna stara fotografia. Niestety, na powstrzymanie szaleńca jest już zbyt późno. Ktoś ginie pożarty przez tygrysa, ktoś natyka się na płynący przez ulice statek, jeszcze ktoś inny wpada pod pociąg, choć przez miasteczko nie prowadzi linia kolejowa…
Połączenie literackiego talentu Jerzego Szyłaka z malarskim Mateusza Skutnika stworzyło jedne z najlepszych duetów komiksowych w naszym kraju. Widać, że Szyłak wczuł się w świat wymyślony przez Skutnika. Ten z kolei – zawierzając scenarzyście, gdy oddawał mu swoje dziecko – nie spodziewał się chyba, że da „Rewolucjom” nowe życie, czego dowodem kolejne tomy tworzone po kilkuletniej przerwie.
„Rewolucje: We mgle” są drugim tegorocznym, albumem Mateusza Skutnika. Poprzedni – „Komiksy znalezione na strychu” – był zbiorkiem jego starych szortów. Teraz dostajemy już materiał zupełnie premierowy. Ale Skutnik i w jednej, i w drugiej odsłownie „smakuje” znakomicie. Oby jeszcze tylko chciało mu się tworzyć częściej. Skoro na album potrzebuje tylko 46 dni…
Mamoń.
Rewolucje 7; recenzja na komiksomanii
September 13, 2012
“Rewolucje” to jedna z najlepszych marek polskiego komiksu. Utrzymana w steampunkowej stylistyce seria Mateusza Skutnika od 2004 roku zaskakuje i urzeka. To inteligentna, świetnie narysowana opowieść o świecie, który mógłby być. Niestety “We mgle” to najsłabsza z dotychczasowych części. Wciągająca i sprawnie poprowadzona, ale jednocześnie pusta i rozczarowująca.
Do spowitego złowieszczą mgłą miasta przybywa cyrk. Jego największą gwiazdą jest hipnotyzer – tajemniczy jegomość, obiecujący, że rzuci czar na wszystkich mieszkańców. Jednak wkrótce po jego występie w przedziwnych okolicznościach zaczynają umierać prominentni obywatele. Pierwszego na środku ulicy zagryza tygrys, kolejnego w szczerym polu rozjeżdża pociąg. Czy ma to coś wspólnego z hipnozą, czy to raczej sprawka mgły?
“We mgle” to drugi tom “Rewolucji” stworzony we współpracy ze scenarzystą Jerzym Szyłakiem. W poprzednim, “Na morzu”, Skutnik i Szyłak bawili się schematami opowieści grozy, opowiadali na nowo historię Titanica, spuszczając na niego krwiożercze ptaki wprost z filmów Alfreda Hitchcocka. Tym razem sięgnęli po kryminał z wątkami fantastycznymi – najbardziej nurtującą zagadką albumu nie jest jednak pytanie “kto zabija?”, ale “jak to robi?”. I “co wspólnego ma z tym mgła, o której wciąż wszyscy przypominają?”.
Sęk w tym, że autorzy pogrywają z czytelnikiem. Zwodzą go, obiecują łamigłówkę, przygotowują scenę pod wielkie rozwiązanie, a następnie, pozostawiają z pustymi rękoma. Szyłak umiejętnie pompuje balon oczekiwań. Jednak w finale, miast przebić go z hukiem, spuszcza powietrze. Puentą jest tu brak puenty, rozczarowanie czytelnika jest zamierzone. Pozostawiony sam sobie, może próbować nadać temu głębszy sens, ale mnie się ta sztuka nie udała.
I na tym polega największy problem “We mgle”. Rozczarowane, nawet jeżeli wywołane celowo, wciąż ma gorzki posmak. A to wszystko, co udaje się Skutnikowi i Szyłakowi uzyskać. Ich opowieść jest więc zwarta, sensowna i angażująca, ale pozostawia po sobie niedosyt. Nawet, jeżeli autorzy osiągają zamierzony cel, to jest to cel niewart świeczki. Po lekturze odbiorca pozostaje obojętny, nieporuszony. Wszak, chodziło tylko o to, by z niego zakpić. Dlatego “We mgle” jawi mi się jako pusta błyskotka, popis warsztatowej sprawności, za którą nie stoi nic więcej.
Żadnych zastrzeżeń nie można mieć za to do pracy Skutnika. W trakcie tworzenia albumu rysownik chwalił się w mediach społecznościowych, że to najlepsze plansze, jakie kiedykolwiek narysował. I trzeba przyznać mu rację. Każdy kadr jest tu niezwykle dopracowany, świetnie dobrana kolorystyka umiejętnie buduje atmosferę, szczegóły nadają światu przedstawionemu wyjątkowości. Zakończenie natomiast, w którym cytowany jest amerykański malarz Grant Wood, to prawdziwy popis, dowód na to, że Skutnik jest dziś chyba najbardziej utalentowanym polskim artystą komiksowym.
Tym bardziej szkoda, że cała ta para poszła w gwizdek.
Tomasz Pstrągowski
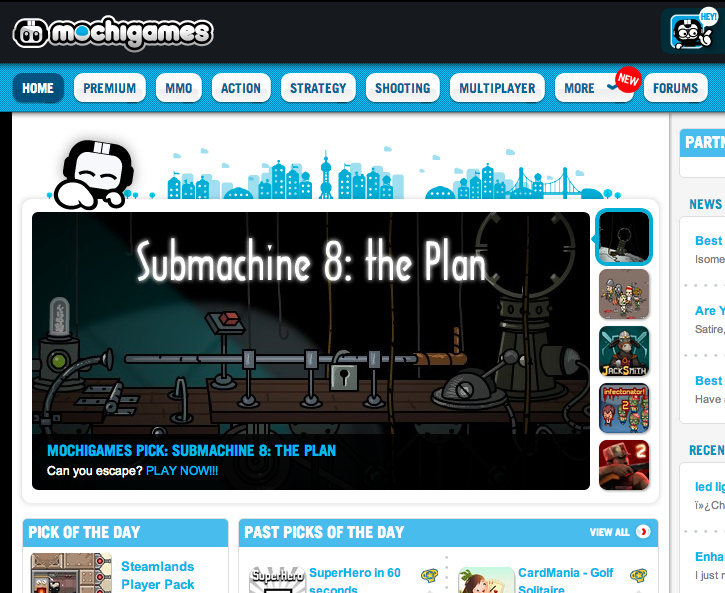
Submachine 8 showcased on mochigames.com
September 10, 2012
Well that’s a first, so just marking the date.
8/10/2012.
Warto docenić inteligencję gracza – wywiad dla polygamii
Gry przygodowe to od lat nisza dla zapaleńców. Od pewnego czasu jednym z jej władców jest Polak, Mateusz Skutnik. Jeżeli graliście w którąś grę z cyklu Submachine, to tak, on jest ich twórcą.
Mateusz Skutnik. Urodzony w 1976 roku absolwent architektury, mieszkający i tworzący w Gdańsku. Zanim stał się znany z powodu swoich gier, stworzył wiele różnych komiksów, między innymi cykl „Rewolucje” i przygody pana „Blakiego”. Niejako równocześnie okazało się, że robienie gier wychodzi mu równie dobrze. Oprocz pracy na własną rękę, od 2008 roku tworzy flashowe produkcje w ramach studia Pastel Games. Lista stworzonych przez niego gier liczy sobie blisko setkę tytułów. Wszystkie do odpalenia prosto z przeglądarki, w każdej chwili.
Niedawno ukazała się ósma część Submachine, jego “flagowej” serii. Nadarzyła się więc świetna okazja, aby zadać mu kilka pytań.
Zanim zacząłeś robić gry, byłeś twórcą komiksów. Ile te dwie dziedziny sztuki mają ze sobą wspólnego?
Nadal jestem twórcą komiksu. Z tego się już nie wychodzi. Oba te gatunki rozrywki są narzędziem do opowiadania. To taki megafon, przez który pokrzykuję sobie swoje historyjki w kierunku tłumu.
To głupie pytanie, ale muszę je zadać: czemu akurat gry przygodowe?
Bo to był pierwszy gatunek, który przypadł do gustu szerszej publiczności. Moim ukochanym gatunkiem gier jest platformówka, od tego też zaczynałem. Ale dopiero przy pierwszym Submachine okazało się, że to właśnie poprzez point and click jestem w stanie cokolwiek ciekawego opowiedzieć i zainteresować szersze grono graczy.
Niedawno ukazała się ósma część Twojego “Submachine”, jak wyglądają prace nad tego typu grą? W odróżnieniu od innych produkcji Pastel Games, tutaj prawie wszystko robisz sam.
Tak samo jak nad komiksem. Najpierw układam sobie w głowie cała historię. Nie piszę scenariusza, nie robię szkiców, tylko zabieram się za przenoszenie pomysłów na papier. W przypadku gier – na ekran. Prawdopodobnie nie ma to nic wspólnego z prawdziwym procesem developingu gier, nie wiem, nie robiłem nigdy gier w większym zespole. Preferuję gry robić samemu, tak jak komiksy, autorsko. Jak już wszystkie lokacje są narysowane zabieram się za zapełnienie świata zagadkami. Potem dźwięki, beta test, kop w tyłek na szczęście i wrzucenie na sieć.
Trochę inaczej wygląda praca nad serią Daymare Town, tutaj zaczynam od białej kartki, rysuję od razu lokacje, przedmioty i zagadki na żywo, bez przygotowania, to taki swoisty flow pomysłów prosto z głowy do gry. Ponownie – mój kierownik projektu pewnie by rwał włosy z głowy, na szczęście nie mam żadnego kierownika projektu.
Ile mniej więcej osób zagrało już w Twoje gry?
Powyżej stu milionów, jednak pamiętajmy, że to internetowe sto milionów, ta liczba tak naprawdę nic nie znaczy. Albo inaczej – z punktu widzenia takiego, że są to darmowe gierki we flashu w internecie – ta liczba nie jest tak wielka, jakby się mogło wydawać.
Robiłeś gry free-2-play, zanim była o nich mowa, byłeś indie, zanim ktoś zaczął mówić o indie grach. Czy czujesz się częścią świata gier?
Robisz ze mnie flashowego hipstera? (śmiech) Gry we flashu zawsze były indie i zawsze były free-2-play. Tutaj nic nie zmienia się od lat. Ale to free-2-play, o którym mówisz, to współczesne pojęcie nie oznacza gry darmowej, jaką jest flash. Oznacza grę, w którą zaczynasz grać za darmo, ale za daleko nie zajdziesz, jeżeli nie zaczniesz kupować fantów wewnątrz gry. Ja tak rozumiem obecnie termin free-2-play. Oczywiście mikrostransakcje we flashu również istnieją, ale szczerze mówiąc kompletnie mnie ten dział nie interesuje. Ja chcę opowiedzieć historię i rzucić pod nogi gracza kilka zagadek, po których rozwiązaniu poczuje, że jest mądry. A przede wszystkim docenić inteligencję gracza – żeby zauważył, że ja, jako twórca gry mówię: tak, wiem, że jesteś mądry, wiem, że to rozwiążesz – dasz radę. Takie delikatne przełamanie czwartej ściany i ojcowskie poklepanie po ramieniu jak graczowi coś się uda. Ludzie bardzo dobrze reagują na takie podejście. Ludzie uwielbiają być docenieni.
Nic tak nie deprecjonuje inteligencji gracza jak oznaczenie ścieżki do punktu, do którego trzeba dojść, napisanie ile metrów jeszcze trzeba przejść, a przy każdej klamce i przekładni napisane, jaki guzik trzeba nacisnąć. Tak, Modern Warfare, patrzę na ciebie.
Szczerze powiedziawszy ja przez większość Submachine czułem się po prostu głupi. Nie pamiętam, czy byłem w stanie przejść którąś z Twoich gier z tego cyklu bez solucji. Czy trzeba być sadystą, aby wymyślać dobre zagadki?
Wiesz co, ja sam bym nie przeszedł żadnego Submachine’a. Nie jestem dobry w rozwiązywaniu zagadek. To jest taki specjalny typ gracza, który uwielbia zagadki i je rozwiązuje. Więc – opierając się nie na naszym subiektywnym zdaniu na temat tego gatunku – tylko na opiniach tychże graczy – zagadki są dobre. I wcale nie sadystyczne. Zła i sadystyczna zagadka to taka, która nie bazuje na logice, tylko na przypadku. Połącz gwóźdź z pszczołą, otrzymasz klucz do stodoły. To są złe zagadki. Ja staram się unikać tego jak ognia. Każda zagadka jest logiczna i można ją rozwiązać samemu bez pomocy nie wiadomo, jakiej wiedzy książkowej, czy też bez wyżej wymienionego randomowego bulszitu.
Aby zagrać w Twoje gry, nie trzeba nic płacić, wystarczy przeżyć reklamy wyświetlane na stronach, na których są publikowane. Jednakże, przy Submachine 8 zacząłeś oferować ludziom możliwość płacenia za pewne bonusy. Skąd ta zmiana nastawienia?
Ano stąd, że obraz gier w sieci zmienia się drastycznie i model sprzedażowy stosowany te 7 lat temu jak zaczynałem, niekoniecznie pasuje do obecnych czasów. Dzisiaj jestem w stanie porozumieć się bezpośrednio z graczami, mogę z nimi porozmawiać, poinformować, spróbować wyciąć pośrednika (sponsor/publisher). Mogę spróbować powiedzieć graczom – spójrzcie, tutaj za niewielką opłatą macie okazję pograć bez reklam i z bonusami. Ale macie też wybór – możecie grać za darmo na sieci. Inna sprawa – stojąc z boku i patrząc na to, co dzieje się na Kickstarterze odnoszę wrażenie, że powoli dochodzimy do momentu, w którym ludzie chcą (i mogą) płacić za jakość.
Co dla Ciebie jest jakością w grach wideo?
Gameplay. Cała reszta to sprawa drugorzędna. Historia jest na drugim miejscu. Potem grafika. Co ciekawe – podobnie jest z komiksami, scenariusz jest ważniejszy od rysunków.
Jakie gry wywarły na Ciebie największy wpływ?
Gry ze stajni Oddworld, Rayman, Neverhood, Half-life i Portal. Tak, wiem, nie ma tu żadnej przygodówki point and click. Grałem w Myst, ale to za trudne dla mnie (śmiech).
Submachine tworzysz sam, ale jesteś też współzałożycielem studia Pastel Games, gdzie współpracujesz w ramach większego zespołu. Łatwo było się przestawić na pracę zespołową, nadal “opowiadasz o czymś” tymi grami?
Co do opowiadania – to opowiada tutaj scenarzysta – głównie Karol Konwerski. To on wymyślił wszystkie sztandarowe serie Pastel Games – Covert Front, the Fog Fall, Great Escape itd.
Jeśli zaś chodzi o mój wkład – nie można tej pracy nazwać pracą w zespole. Ponownie – ja nie jestem dobry w pracy zespołowej. W momencie, gdy zespół Pastel Games skończy pracę nad grą (ukończenie scenariusza i kompletu grafiki) – taka podkładka trafia do mnie. Czytam scenariusz, patrzę, co jest narysowane i robię z tego grę, która ma ręce i nogi. Tyle z pracy zespołowej.
A ktoś proponował Ci przeniesienie gier na jakiś inny format? Na przykład zebranie wszystkich Submachine w jednym miejscu i wydanie na Steamie. Zgodziłbyś się?
Submachine to raczej gra niszowa, żeby się wbić na Steam trzeba by zrobić coś bardziej casualowego. Ja jestem słaby w rzeczach casualowych. Nie, nikt nie proponował przeniesienia Submachine na Steama, chociaż bardzo bym chciał. Jedynymi, którzy to sugerują są fani, ale oni to by chcieli na wszystkich platformach mieć Submachine’a. Steam, iOS, Android, PC, MAC, Nawet na DS (genialny pomysł! inventory na drugim ekraniku!).
Jeżeli ktoś by coś takiego zaproponował – musiałby się liczyć z pozostawieniem mi całkowitej wolności reżyserskiej. Tak więc tu urywa się ta rozmowa o portowaniu na Steama (śmiech).
Wiele się ostatnio mówi o tym, że trzeba już skończyć z flashem i przestawić się na HTML5. Czy to ma dla Ciebie w ogóle jakieś znaczenie?
Już od dawna słyszy się gromkie głosy o tym, że Balcerowicz musi odejść. Tzn. – flash. Ja na razie stoję po stronie flasha na tej barykadzie, bo w momencie, gdy flash zniknie z sieci – skończy się moje radosne gier robienie. Action Script to jedyny język programistyczny, jaki znam. Ja nie jestem programistą, nie wiem czy dałbym radę przestawić się na inny język. W moim wieku…
Nie wierzę, że po tylu zrobionych grach, porzuciłbyś robienie kolejnych w przypadku śmierci flasha. Może po prostu znajdź sobie jakiegoś chętnego programistę? Sam mówisz, że praca z kimś nie musi oznaczać pracy zespołowej.
Wiesz co, to już szybciej bym usiadł i się nauczył nowego języka programistycznego.
Rozmawiał Konrad Hildebrand
Submachine 8, english walkthrough
August 31, 2012
- Read every scrap of paper you pick up, it may contain something important.
- Hovering your mouse over an inventory item will give you its name, this can be very helpful.
- Click on the number 8 which appears on your screen to begin the game.
- Names of places in the game are my own and are arbitrary based upon descriptions.
- Watch for the changing cursor which can indicate both clickable areas and navigation.
- Each level has the same number of scenes, in the exact same order. However, not all of them connect in the same way in each level.
- If you are at a dead end, use the device to travel to a different level, move in the direction you want to go, then go back to the original level. This will get you around obstacles.
- Good luck!
Level I (The Catwalk)
- You begin on top of a wooden catwalk, with lots of odd machinery around.
- There is a red button which you can push, which partially moves part of the catwalk. It is blocked by the long metal rod in front of it. Note that the rod is locked into place with a padlock.
- Go right.
- This is the right end of the catwalk. Note the satellite dish beaming some sort of green energy to the right.
- Below the catwalk are some metal bars. Hover your cursor and find the clickable area, then click to take the piece of metal.
- There is a vertical brass pole sitting here with a handle near the top. Click on the handle to move the pole to the left.
- Go left, then left again.
- You should now be on the left edge of the catwalk. Here’s another satellite dish, and a key hanging below.
- Use the broken beam (piece of metal) from your inventory on the key to bring it up to the catwalk.
- Take the key then go right.
- You should now be back to where you began, the middle of the catwalk.
- Use the key on the padlock hanging from the metal bar.
- Once the bar is unlocked, click on the far right end of the bar to move it to the right.
- Now you can push the red button and part of the catwalk will drop down. You can now move down.
- Go down once. Here you will see a piece of paper impaled on the ladder, take it.
- There is also a red stone hanging from the brass pole, take it as well.
- Go down.
- You’ve landed on a round area. There is a rod to the left that you can move down and up, but it doesn’t seem to do anything.
- There is a lever to the right, don’t touch it yet.
- Go right.
- You are now further along the spherical thing. Note the ship tethered to the right.
- Hanging from the rope that tethers the ship is some sort of device, take it.
- The device is called OIIIIIII. Click on it once it is in your inventory.
- It’ll say you need to put electrodes on your head, do so.
- Note the device has one lit button. Clicking on it will just bring you back to the scene.
- Go left.
- You are now back to where you came off of the ladder. Click on the lever to the right and it will activate another beam of light.
- Pull up the weird device from your inventory and note that it now has two active lights, the upper left and the upper right.
- Click on the upper right button.
- Congratulations, you’ve now found level II.
Level II (The Palace)
- You are now in what looks like an Islamic type palace. There is a staircase in front of you and an odd looking machine to the left of the staircase.
- Clicking on the machine makes the handle go up and down, but not much more.
- Click on the staircase to go up.
- You are now at the top of the stairs, in a dome-shaped room. There is what looks like an altar here with a compass rose.
- Click on the stairs to go back down.
- Go right.
- You are now facing a large cabinet with multiple doors. Note that one of the doors is missing a knob.
- Click on each door to open it. Inside you will eventually find another piece of paper and a small chest opener that looks like a lever. Take both items.
- Go right.
- There is an odd circular thing on a pole here. You can turn it by clicking on it. Note the triangular shaped item on the circle.
- Go right.
- You are in front of another set of stairs. To the right of the stairs is a screen, click on it.
- This screen has seven buttons, two of which are red. If you click a red button, it turns green and shows a drawing of a room.
- The left button shows a room we haven’t seen. The next button shows a drawing of the room we are in.
- Back up out of the screen.
- Click on the stairs to go up.
- Here’s another dome room with another altar. This one has the letter N on it, and two dials.
- There is a piece of paper on the floor, pick it up.
- This is a drawing. If you examine the drawing in your inventory you will see two circular shapes, one with a stripe, one that looks like a donut. Note the Roman numerals III and IV besides the shapes.
- Close down the paper and click on the stairs to go down.
- Go left three times to where you entered the palace, the other stairs with the strange machine.
- Pull up the device from your inventory. Note that here it is called the IOIIIIII.
- Click the upper left button and you will be back to Level I where you got off of the ladder.
Navigating Levels I and II
- Note that when you use the device, it brings you to an area that is equivalent to one you are already in.
- For instance, from where you are (base of the ladder), you end up at the base of the left staircase.
- If you go right to where the ship is tethered and use the device, you will end up in the room to the right of the left staircase, the one with the cabinet.
- This also works in reverse, since you can’t enter the spaceship from Level I.
- Go to level II the palace.
- Go right until you are at the circular thing on a pole.
- Pull up the device and push the upper left button.
- You are now inside the spaceship you saw tethered in level I.
- Hover your cursor, there is a drawing on the wall, take it when you find the clickable area. This is a picture of two circles, one with a dot, one with a plus sign.
- Note in the middle of the scene is a small tool-box looking thing. The lock on the front looks triangular, just like the small chest opener tool you picked up earlier.
- Use the tool on the chest to open it.
- Inside you will find a cog, take it.
- Go right.
- You are now in the right side of the spaceship. Note that it looks like the drawing on the screen we saw in the palace.
- On top of a console below what looks like a porthole is some sort of tube or transistor (energy coil), take it.
- Click on the top of the ladder to go up.
- Okay, is that rust or blood? At any rate, on top of the spaceship you should see a red stone, this one with a plus sign on it. Take the stone.
- Pull up the odd device and push the upper right button. this will take you to level II, the upper right room.
- Click on the stairs to go down, then go left three times to the left staircase.
- Click on the staircase to go up to the dome room.
- Pull up the odd device and push the upper left button. This should take you back to level 1 somewhere midway up the ladder to the catwalk.
- Now you can see how the levels correspond. On level 1 on the bottom you have the bottom of the ladder, the place where the ship is tethered, and the two scenes inside the ship.
- These correspond to the left staircase, the cabinet, the round thing, and the base of the right staircase in the palace.
- That also means that the upper left button takes you to level I, and the upper right button takes you to level II.
- However, we haven’t seen the level II equivalents for the catwalk yet.
- Go up to the catwalk.
- You should now be on the catwalk where you began.
- Pull up the device and click on the upper right button.
- You are now on level II and facing the top of a dome. On top of the dome is a red stone, take it.
- Go left.
- There is some sort of device here, with wires running to it on either side.
- Put the white bulb/transistor on top of the device. Notice the light below it turns green.
- Go right twice.
- Here the wires terminate in a lever and another device. Click on the lever to flip it, and you will create another green beam of light.
- Look at the device in your inventory, you have now opened level III, and a button on the left is now lit.
- Time to visit Level III.
Level III (The Forest)
- You should still be standing at the beam of green light in level II.
- Pull up the device from your inventory and click on the second button down on the left.
- You are now on level III. You see an odd device with a cog in front of you, and a tree trunk to the right.
- Go left.
- There is a smaller tree trunk here, with footholds, it is obviously a ladder down.
- Go left.
- This is the end of the walk on this side. Note the two ropes and two pulleys to the left. To the right is a semi-circular control. If you click on it you will see that one of the cogs moves and one doesn’t.
- Go right.
- You should now be at the ladder. Go down.
- You are now at the middle of the ladder. Note that in one of the branches is a semi-circular beam, take it.
- Go down.
- You are at the base of the ladder, which is built into a tree. There is a piece of paper to the left of the tree, take it.
- Go right.
- You are at the base of a tree. Notice in the tree is another one of those levers that you can push in.
- Go right.
- Here’s an odd circular thing on a pole, similar to the one in level II, but with something inside. Note the notch in the inside circle.
- Go right.
- You are at the base of a pillar. There are four holes on the right, and on the left is a button and what looks like rods.
- Click on the button at the left base of the pillar and the rods will shoot out. You can now climb. Go up.
- There is an odd device on top of the pillar. There is also an empty square on the left above the rods.
- Go down and go left 3 times.
- Go up the ladder twice and go left.
- Take the cog from your inventory, then place it between the two cogs on the left.
- Once the cog is in place click on the semi-circular lever to activate the cogs.
- Go right twice to the pulley thing and you will find that it has been raised, revealing a red brick.
- Take the brick.
- Go left to the ladder, then down twice.
- Go right twice to the circular thing.
- This thing looks an awful lot like the one in level II.
- Pull up the device from your inventory, then click on the upper right button to go to level II.
- Click on the circular device until the triangle shape is between the 4:00 and 5:00 position, the same position it would need to be to cover the notch in the thing in level III.
- Now pull up the device and click the button, second down on the left to go back to level III.
- Note that the position of the triangular thing on the outer circle has moved to cover the notch. You can now see a red stone in the middle of the circle, take it.
- Go right.
- You should now be at the base of the square pillar. Note that it is red, and that there are four circular holes on the right side.
- You also should by now have four red stones that would probably fit into those circles.
- The order they should go in, from top to bottom, is determined by the pictures you picked up.
- From top to bottom it should be: the one with the dot, the one with the plus, the one with the stripe, and the one with the large circle.
- Now go up the rods.
- Note the square hole above the rods. Place the red brick in the hole and click to depress.
- The device at the top of the pillar should activate, you have now opened level IV.
Level IV (The Pipes)
- Pull up the device from your inventory. Note the second from the top right button has now activated. Push it to go to level IV.
- You are now inside a tunnel with a ladder going down. There is some sort of circular device in front of you, and a lever in the upper left that doesn’t appear to do anything.
- Go down.
- You are now at the base of the stairs. Note there is another of those pump-like things like we saw in level II.
- To the left is a small pipe, click on it.
- You are now in another tunnel, but there is no ladder going up. There are pipes to the left and right, and a skinny pipe going up from the floor.
- There is an object to the left of the skinny pipe, take it (drawer handle).
- Click on the left pipe to go left.
- You are now in another pipe, this one filled with dirty water. There is a ladder, but it only goes down to the water.
- Pull up the device and go to level II by pushing the upper right button.
- You should now be at the cabinet on level II. Use the drawer handle to open the one door you couldn’t open the first time.
- Inside is a small mirror, take it.
- Go right twice.
- Click on the screen for a close up.
- Note that the first four buttons are now all active. If you click each one, it shows the scene for this particular room on each level, level I the spaceship interior, level II the right stairs, level III the pillar, and level IV the pipe with the ladder and the pump.
- Back up.
- Go left three times to the left stairs.
- Once there, use the device to go to level IV.
- You are now in a pipe with a ladder going upwards. There is also a strange handle on the right, click on it.
- Did you hear the water draining?
- Go up the ladder.
- You are now mid-way up the ladder. There is a piece of paper on the wall, take it.
- The paper is another drawing, this one of arrows and an S.
- Go up.
- You are now at the top of the ladder, with pipes going to the left and the right.
- Go left.
- There is a piece of paper on the left wall, take it.
- There is another one of those mysterious levers that can be pushed in.
- Go right twice.
- There is an electrical cord draped here, take it.
- Go left once to the top of the ladder, then go down twice.
- Use the device to go back to level II.
- Once on level II go right once to the cabinet.
- Use the device to go back to level IV.
- Note that the water is gone, so you can go down the ladder. Go down.
- Use the device to go to level I.
- This is a new area, beneath where the ship is tethered. There is an odd button, and a frayed wire. You can also take the bottom ladder rung and a fuse.
- Go to level II.
- This appears to be a basement in level II. There is another of those push-in levers, and a stone pyramid on the floor. Take the pyramid.
- Go to level III.
- This appears to be beneath the roots of a tree. There is an odd dome-shaped device that looks like a trash can.
- Go to level I.
- Go up. Notice that there are holes for a ladder rung at the bottom of the scene.
- Use the ladder rung in those holes, you have now created an alternate way to get to the secret area in level I.
- Go down to the secret area.
- Use the device to go to level IV.
- Use the fuse on the button looking thing on the left wall. The light will turn green.
- Go up, then go right twice.
- Go up.
- Click on the lever on the upper left part of the wall.
- Congratulations, you have opened level V.
Level V (Rooftop)
- Use the device to go to level V. That is the button on the left, third from the top.
- You should be at a statue. Notice another of those mysterious push levers above the statue.
- Go down.
- You are now at the base of the statue. To the right and slightly behind the base is an item, take it (beamer arm).
- Go left.
- You are on the top of a roof. Note the cat statue and the chimney.
- Go left.
- You are now at an arch. Most of the arch is lit up with blue, but some is not. There are stairs leading down from here.
- Go down.
- The stairs end at a pool of purple water. There is a note on the stairs, take it.
- Go up, then left.
- You are now at the edge of a wall. Go up.
- There is a note here, take it. Also note the rope extending upwards.
- Go up.
- You are now at the top of the wall. Go left.
- Here is another stone pyramid, but you can’t take it.
- Use the device to go to another level like level I.
- On level I go right twice.
- Go back to level V.
- Here’s another stone pyramid, and a base for another.
- Place the stone pyramid from your inventory on the base.
- There is a small arm extending from the right pyramid with a small round base. Place the mirror on this base.
- The left pyramid (which you just placed) is clickable, click on it to rotate.
- Congratulations, you’ve opened level VI.
Level VI (Underground Bunker)
- Pull up the device and click on the third from the top right button to go to level VI.
- You are inside a curved room. There is another one of those pump devices here that doesn’t do anything along with some artillery shells.
- Go left.
- There is a hatch here that goes down. Just above the hatch is a gold colored pedestal. Here you can place the two beamer arms and the red wire. Looks like we need another beamer arm, though.
- Go left.
- And here’s a rather frightening looking piece of artillery, pointing out of a window to the left. Note the incomplete red wire on the ground.
- Go right then go down.
- You are on a ladder with two pipes on either side of it. Behind the left pipe is a piece of paper, take it.
- Go down.
- On the left is another wheel mounted gun of some sort. On the gun is a piece of paper, take it (picture).
- Go right.
- There is a switch on the wall here, when pulled it causes a wall to appear on the right.
- Pull the switch. Now use the device to go to level 2. While in level 2 go right.
- Once you’ve gone right, use the device to go back to level 6. You are now on the other side of the wall you just made appear.
- Notice the paper on the wall, take it.
- The paper is another picture, showing dots on a grid.
- In front of you is a blue barrel, with the numbers VI, IV, and II on it, each with a red light.
- The handle to the right causes a metal belt to rise. It can turn one light green at a time.
- Go right.
- You are facing a doorway with a ladder going up. Above the door is a wheel button, take it.
- Click on the ladder to go up.
- You are on another ladder, with a pipe on either side. Stuck in the right pipe is a beamer arm, take it.
- Go to level IV.
- Go down, left, left, and down.
- Use the device to go to level VI.
- Here you will find another of those push levers.
- Go to level IV.
- Go up, then go back to level VI.
- Pull the lever to make the wall go away, then go left.
- Click on the ladder to go up (twice).
- Add the beamer arm to the device. Now we just need power…
- Go down twice then go right twice to face the barrel.
- Click on the handle until it is on the II.
- Use the device to go to level II.
- Go left until you hit the stairs. Notice the pump thing? The light is green! Click on the handle to raise it.
- Go back to level VI.
- Go right twice to the barrel.
- Click on the handle to lift the bar to IV. Notice the light for II stays green.
- Use the device to go to level IV. Go right and lift the handle on that pump.
- Use the device to go back to level VI. Go left to the barrel.
- Click on the handle to raise the bar to VI. Then go left twice, up twice, and then right to the pump.
- Click on the handle to lift it.
- Go left, then down twice, then right twice to the barrel.
- Notice the barrel has opened. Click on the bottom of the barrel to take the item revealed (storage cell).
- Go left twice, up twice, then left to the artillery gun.
- Attach the storage cell to the red wire.
- Go right, then pull the lever.
- Congratulations, you’ve opened level VII.
Level VII (Bamboo)
- Use the device to go to level VII (bottom left button).
- You appear to be on a catwalk made of bamboo. There is a large brown bundle tied beneath the catwalk.
- Go right.
- There appears to be some sort of wooden device here with three connectors, which lead to a large stone thing.
- Go left twice.
- This is what looks like the top of a mountain. On the left is a green slab with a paper on it, take the paper.
- Go right.
- Go down. There is a rope ladder that ends here, so you can’t go down further.
- Use the device to go to level I. Once at level I go down.
- Use the device to go back to level VII.
- There is a pole here with ropes going up. Go right.
- This is a ridge above a cave. Go down to the cave.
- Here’s another of those push levers. Go back up.
- Go right.
- There is a mound here that looks like an anthill. Go right.
- There is a wooden ladder here. At the base of the ladder is a valve made of wood, take it.
- Go up.
- You should be on a bamboo platform. Laying on the platform is a stone button, take it.
- Also on the platform is another device that once again connects to stone.
- Go down.
- Go left 3 times to the pole.
- Attach the valve to the pole.
- Click on the valve to turn it.
- Use the device to go to level I. Once at level I go up twice, then go back to level VII.
- Go right.
- The wooden device should now be open, revealing a hammer. Take the hammer.
- Go left to the ladder.
- Go to level I, then go down twice.
- Go to level II.
- Go right three times to the staircase.
- Click on the screen for a close up.
- Click on all of the buttons on the screen to turn them on (green).
- When all of the buttons are on you will see the text “the plan_sector 9”.
- Back up, then go up the stairs.
- Add the wheel button to the middle of the altar. The altar should now have three buttons.
- The clue for the direction of the buttons is on the third picture you picked up. However, the picture shows the orientation of the buttons from the South side.
- Flip the picture 180 degrees to see the correct orientation as you are seeing the altar on the north side.
- Once you set the buttons correctly, go down the stairs, left three times, then up the other stairs.
- The other altar will now be open. Click on it to get a catalyst stone.
- Go to level I.
- Go down.
- Use the device to go to level VII.
- Go right twice to the mound.
- Add the catalyst stone to the mound.
- And we have another beam of green light.
- But the device only has seven buttons!
- Use the device to go to level V.
- You should be at the cat statue.
- Place the stone button in the chimney to the right of the cat, then push it.
- Go left to the arch.
- Notice that it is completely lit up, and now has a gate made of light.
- Click on the gate.
- We’re knocking, but nobody’s home.
- Now what?
End Game
- Look at the last drawing you picked up, the one with dots on a grid.
- There are seven dots on that grid, each in one of three positions.
- The task is to go back to each level and find those push levers.
- Go to level I.
- Go left and you will find the first lever. Make sure it is pushed all the way down.
- Now go right, then down to the “secret” area.
- Go to level II.
- The level II lever should be pushed all the way down.
- Go back to level I, then go up and left.
- Go to level III and go right.
- The lever is right there in the tree, push it in once so it is halfway down.
- Go left, then go to level IV.
- Go up twice and to the left.
- The level VI lever should not be pushed in at all.
- Go to level V.
- Go right, down twice, right three times, then up once.
- The lever on level V should be pushed all the way in.
- Go to level VI.
- Go down and to the left 3 times.
- Go to level I.
- Go right then down to the “secret” area.
- Go back to level VI. The lever should be all the way out.
- Go to level VII.
- The lever should be halfway down.
- Now go back to level V.
- Go left, then up twice, then left.
- The single pyramid should have risen up, revealing a blue glowing ball (energy trail). Take the item.
- Go right, down, down, and right.
- Place the ball in the gate.
- Knock again.
- Click on the open gate. Reality will fry out for a moment.
- Now the gate is a real one, not energy.
- Click on the open gate again.
- Whoa!
Author: Grinnyp on jayisgames.com
Submachine 8, la solution francaise
Submachine 8, the plan, la solution :
– Cliquer sur le 8 pour commencer puis lire les dialogues. On commence dans le premier univers. Aller à droite, récupérer la barre métallique courbée sous le ponton, déplacer la barre avec la manette en haut à gauche. Aller deux fois à gauche, utiliser la barre pour récupérer la clé. Prendre la clé et revenir à droite, l’utiliser pour ouvrir le cadenas, retirer la barre qui bloque puis appuyer sur le bouton rouge pour ouvrir la trappe, descendre.
– Récupérer la bille rouge sur la droite et la feuille accrochée à l’échelle puis descendre encore. Cliquer sur le levier à droite pour allumer un rayon vert. Aller à droite et récupérer l’appareil avec les espèces écouteurs. C’est cet appareil qui va nous servir à voyager entre les mondes parallèles du jeu. Cliquer sur l’appareil dans l’inventaire et sélectionner la phrase « OK, i’ll do it ». Le bouton en haut à gauche correspond au premier univers (si on clique dessus on revient au même endroit), celui en haut à droite correspond au deuxième univers, cliquer dessus.
– Ouvrir tous les tiroirs de l’armoire et récupérer une manivelle et une feuille, noter le tiroir fermé sans poignée. Aller à gauche, noter la poignée. Aller deux fois à droite et noter le grand cercle. Aller à droite et cliquer sur l’écran, si on clique sur les boutons verts on peut voir la pièce actuelle et celle correspondant dans le premier univers, il y a 7 boutons soit 7 univers parallèles (les univers ont la même structure, si on est bloqué par un obstacle dans un univers on peut passer dans un autre pour avancer et revenir au précédent). Monter les marches, noter l’espèce de boussole et ramasser le plan au sol. Observer le plan dans l’inventaire, noter la forme des billes et leur association avec les chiffres III et IV.
– Utiliser l’appareil pour revenir au premier univers, récupérer la bille rouge et descendre dans la trappe. Prendre l’espèce d’ampoule et aller à gauche. Récupérer la feuille et l’observer dans l’inventaire (noter les billes et les chiffres I et II). Ouvrir le boitier gris avec la poignée, récupérer un engrenage.
– Revenir au deuxième univers, aller deux fois à gauche (noter l’appareil avec la poignée) et monter les marches. Revenir au premier univers, monter à l’échelle puis revenir au deuxième univers. Récupérer la bille sur la coupole, aller à gauche et placer l’ampoule au-dessus du point rouge. Aller deux fois à droite et abaisser la manette pour activer le troisième univers, y aller avec l’appareil.
– Aller deux fois à gauche placer l’engrenage entre les deux autres à gauche puis cliquer sur la manette pour enclencher le mécanisme. Aller deux fois à droite et récupérer un cube rouge. Revenir à gauche et descendre, récupérer le demi-cercle métallique sur la branche à gauche et descendre encore. Ramasser la feuille au pied de l’arbre, aller à droite. Noter le cercle avec une encoche triangulaire. Revenir dans le deuxième univers et faire pivoter le grand cercle jusqu’à placer le triangle à l’emplacement de la fente de l’univers 3. Revenir au troisième univers et récupérer la quatrième bille rouge.
– Aller à droite et cliquer sur le cube qui dépasse, placer les billes dans l’ordre selon les notes ramassées (de haut en bas : bille avec un trou, bille avec une croix, bille avec une bande, bille avec un rond). Monter et placer le cube dans l’emplacement, l’enfoncer pour ouvrir le passage vers l’univers 4 et y aller avec l’appareil.
– Descendre puis entrer dans le tunnel à gauche, ramasser la poignée au sol. Aller à gauche, on est bloqué par de l’eau. Revenir au deuxième univers avec l’appareil et utiliser la poignée pour ouvrir le tiroir fermé, récupérer le miroir. Aller à gauche et revenir dans l’univers 4, tirer la pompe puis monter à l’échelle, récupérer une feuille indice. Monter encore et aller dans le tuyau de gauche, récupérer la feuille. Aller deux fois à droite et prendre le fil électrique.
– Revenir à gauche et descendre deux fois, retourner dans l’univers 2, aller à droite et revenir dans l’univers 4. Descendre puis revenir dans l’univers 2, récupérer la petite pyramide en pierre. Aller dans l’univers 1, récupérer le fusible à gauche et le barreau cassé à droite. Retourner dans l’univers 4 et placer le fusible dans le trou. Monter à l’échelle et revenir dans le premier univers.
– Placer le barreau d’échelle dans les deux trous, descendre et revenir à l’univers 4. Monter et aller deux fois à droite, monter et cliquer sur le levier en haut à gauche pour ouvrir le passage vers le cinquième univers, utiliser l’appareil pour y aller.
– Descendre et ramasser l’arceau derrière la statue, aller deux fois à gauche et descendre, récupérer la feuille. Monter et aller à gauche, monter et récupérer une feuille au mur. Monter encore et aller à gauche. Revenir dans le premier univers, aller deux fois à droite et revenir dans l’univers 5. Placer la petite pyramide sur le socle à gauche et le miroir sur l’espèce d’antenne, tourner la petite pyramide pour ouvrir le passage vers l’univers 6 et y aller avec l’appareil.
– Aller à gauche, brancher le câble électrique sur l’appareil au milieu de la pièce et ajouter les deux arceaux déjà ramassés. Descendre, récupérer la feuille derrière le tuyau à gauche, descendre et récupérer la feuille à gauche. Aller à droite, abaisser la manivelle, revenir dans l’univers 5, aller à droite et revenir dans l’univers 6. Prendre la feuille derrière le panneau métallique, aller à droite récupérer la manette au-dessus de la porte puis monter à l’échelle, récupérer le dernier morceau d’arceau derrière le tuyau à droite.
– Revenir à l’univers 4, descendre, aller deux fois à gauche et descendre encore. Revenir dans l’univers 6, noter le piston contre le mur à droite. Revenir dans l’univers 4, monter puis retourner dans l’univers 6. Relever la manette pour enlever le mur à droite puis aller à gauche. Monter deux fois et placer le dernier morceau d’arceau sur la machine. Descendre deux fois et aller deux fois à droite, placer la manette de la machine sur le II et aller à l’univers 2. Aller à gauche deux fois et lever la manette de l’espèce de pompe.
– Revenir à l’univers 6 au niveau de la machine et placer la manette sur le IV et aller à l’univers 4. Aller à droite et monter la manette de la pompe. Revenir à la machine et placer la manette sur le VI, aller deux fois à gauche, monter deux fois et aller à droite, monter la manette de la pompe. Revenir à la machine et récupérer la batterie, aller deux fois à gauche, monter deux fois et aller à gauche. Accrocher la batterie aux fils puis revenir à droite, cliquer sur la manette pour ouvrir le passage vers l’univers 7 et y aller avec l’appareil.
– Aller à gauche et récupérer la feuille sur la pierre. Aller à droite et descendre. Revenir à l’univers I et descendre puis revenir à l’univers 7. Aller à droite, descendre et noter le piston, remonter et aller à droite deux fois, récupérer l’espèce de volant en bois. Monter et récupérer le bouton en pierre, redescendre et aller trois fois à gauche, placer le volant en bois sur le poteau et le faire tourner.
– Revenir à l’univers 1, monter deux fois et revenir dans l’univers 7. Aller à droite et récupérer le marteau. Aller à gauche, revenir à l’univers 1, descendre deux fois et aller à l’univers 2. Aller trois fois à droite, cliquer sur l’écran et allumer tous les boutons en vert, le texte « the plan_sector 9 » apparait. Reculer et monter à l’étage. Placer le bouton avec la flèche de l’inventaire sur l’espèce de boussole. Placer correctement les trois flèches en fonction de l’indice de la feuille (attention à l’orientation vers le sud, ce qui donne de gauche à droite : droite, gauche, bas). Redescendre, aller trois fois à gauche et monter. Prendre la bille en pierre dans la trappe ouverte.
– Revenir à l’univers 1, descendre et aller à l’univers 7. Aller deux fois à droite et placer la bille dans l’espèce de mini-volcan. Revenir au niveau 5 et aller à gauche, la porte est maintenant complètement allumée, on peut frapper mais elle ne s’ouvre pas. Il faut maintenant placer les pistons de chacun des sept univers selon le modèle de la feuille dans l’inventaire.
– Revenir à l’univers 1 et aller à gauche, baisser le piston à fond. Aller à droite et descendre, aller à l’univers 2, baisser le piston à fond. Revenir à l’univers 1, monter et aller à gauche. Aller à l’univers 3 et aller à droite, enfoncer le piston à moitié. Aller à gauche et revenir à l’univers 4, monter deux fois et aller à gauche, le piston doit être complètement sorti.
– Aller à l’univers 5, aller à droite, descendre deux fois, aller trois fois à droite et monter, enfoncer complètement le piston. Aller à l’univers 6, descendre, aller trois fois à gauche et revenir à l’univers 1. Aller à droite et descendre, revenir à l’univers 6, le piston doit être complètement sorti. Revenir à l’univers 7 et descendre le piston à moitié.
– Revenir au niveau 5, monter, aller à gauche, monter deux fois et aller à gauche, récupérer l’espèce de boule d’énergie. Revenir en arrière jusqu’à la porte et placer la boule d’énergie dans l’emplacement de la porte, toquer et entrer.
//—-
Il y a cinq secrets cachés dans le jeu, voici leurs emplacements :
– Secret 1 : Il faut d’abord remettre la grande barre métallique de l’univers 1 (celle où on a trouvé la bille rouge) sur la droite. Dans l’univers 3, aller tout à gauche là où on a placé l’engrenage et récupérer le premier secret (une petite bille verte).
– Secret 2 : Dans l’univers 3, à l’endroit où l’on récupère la bille rouge (dans l’espèce de disque qui tourne avec celui de l’univers 2), cliquer sur une des dalles au pied du disque, sur la gauche.
– Secret 3 : Il faut d’abord avoir récupéré le marteau dans l’univers 7. Revenir à la pièce cachée sous l’arbre de l’univers 3 (en passant par l’univers 1 ou 4) et casser le dôme rouge avec le marteau pour récupérer le secret.
– Secret 4 : Dans le niveau 6, aller à droite de l’appareil avec les chiffres II, IV et VI, noter les espèces de plaques rondes sur les tuyaux à droite. Utiliser le marteau plusieurs fois sur celle du haut jusqu’à la casser et récupérer le secret.
– Secret 5 : Dans l’univers 7, au moment où on récupère la boule d’énergie, ne pas la placer tout de suite dans la porte. Revenir vers la statue de chat et la briser avec le marteau, placer le bouton en pierre sur l’espèce de cheminée et utiliser la boule d’énergie sur les inscriptions de la cheminée (elles deviennent bleues) puis appuyer sur le bouton. Récupérer le secret qui apparait.
Une fois le jeu fini, si on revient à l’écran de départ une ligne « secrets hub » est apparue, cliquer dessus pour découvrir les secrets.
Author: Lambda
« Previous Page — Next Page »