submachine 7: Best game 2010


As it turns out Submachine 7 is the best point and click game of 2010 as voted by JayIsGames audience. You can catch them results here. Big thank You to everyone who voted this year. If you look closely you’ll also find Daymare Town 3 as the second runner up. And if you’ll look even closer at other categories you’ll also find subnet somewhere there.

Thanks!


Where is 2011?


play

Uh, oh! Did another year just pass by unexpectedly?? I’m afraid it just did. And what a year that was! But what’s past is past and let’s look forward in search for the new one. As usual I’d like to thank all of you for your undying support – that’s one of things that energize me to do more and more games.

It’s becoming a yearly tradition that I’m expressing my gratitude through a year-ending minigame, each year a different one, from different genre and art style. So please don’t let me stop you – go, explore, find him. Let’s put 2010 to rest. It deserves it.

But remember – it is a minigame, I don’t want to hear that it’s short. And could use some colors. ;D

Anyway.

Happy New Year everybody!


Season’s greetings 2010


… As I’m almost leaving for the Christmas Eve Celebration I wish you all peaceful holidays …


Submachine 7: the core


play this game

Ok, then. As far as I remember Murtaugh betrayed us at the end of Sub6. Now, here lies the question: do we follow him into the rabbit hole? Yes, yes we do. As we end up in the Core, the epicenter of the Submachine structure (or network as some people call it) – we’re discovering completely new world within. Things you have never seen before in submachines, story unfolding before your very eyes and locations you didn’t think were even possible to construct in our physics bound 3-dimentional world. Mindblowage ensues.

reviews: -ak- | jig

walkthrough: video | english | francaise


Submachine 7; la solution francaise


– Aller à droite et prendre la grande tige métallique. Aller à droite, pousser les planches en bois et prendre la petite pierre carrée. Aller à droite, ramasser la carte magnétique au sol et prendre les feuilles sur la table. Aller encore à droite et ramasser la feuille.

– Aller à gauche jusqu’à se retrouver face à un champ d’énergie bloquant la route. Utiliser la carte sur la fente de l’appareil et abaisser la manette, prendre l’ampoule de la lampe qui s’éteint.

– Aller à gauche et utiliser la tige métallique pour casser l’ampoule de l’autre côté du champ d’énergie. Aller à gauche et ramasser la manivelle au sol contre les tuyaux. Aller deux fois à gauche, prendre la baguette de gong contre le mur. Aller à gauche, ramasser la clé posée en bas à droite. Aller à gauche, regarder dans le pot vide à droite et prendre la pierre rouge.

– Aller deux fois à gauche, regarder dans le pot vide au centre et prendre la feuille. Aller à gauche, regarder au sol à gauche du pot de droite pour trouver une pièce. Aller encore à gauche et prendre la pierre dans la main de la statue.

– Revenir au gong, utiliser la baguette pour le faire sonner. Aller à droite et noter la porte qui est apparue. Revenir à l’endroit où on a trouvé la carte magnétique, utiliser la clé sur la boite au sol pour l’ouvrir et trouver un cristal.

– Retourner à la porte apparue à droite du gong, placer le cristal dans l’encoche sur le pilier gauche puis cliquer sur le petit autel à droite. Disposer les trois pierres comme sur le dessin dans l’inventaire (spirale en haut, rouge en bas à gauche et carrée en bas à droite). Placer la manivelle dans le trou central et la tourner. Reculer puis passer la porte activée.

– Prendre la feuille sur le pupitre à gauche. Aller deux fois à gauche et prendre la feuille. Aller encore à gauche et passer le seul portail actif. Aller à droite, prendre la clé au sol puis repasser le portail. Revenir à la porte par laquelle on est arrivé (avec le cristal). Aller à droite, cliquer sur la rambarde de droite et descendre l’échelle. Prendre la feuille, aller à gauche et prendre la clé triangulaire au sol. Remonter l’échelle, aller à gauche et entrer dans le portique à droite.

– Prendre un dépliant sur le pupitre, aller à droite et cliquer sur le passage caché dans la fissure au dessus de la porte. Prendre la feuille, aller à gauche et débloquer la porte barrée. Monter les escaliers et aller à gauche. Cliquer sur le passage dans la fissure de la pierre qui flotte à gauche. Prendre la clé carrée au sol puis revenir en arrière jusqu’aux escaliers. Aller à droite, prendre la feuille au sol et la pièce cachée dans une fissure au mur. Ouvrir la porte avec la clé et entrer.

– Prendre la feuille sur le bureau, cliquer sur la machine et abaisser les trois autres manettes. Revenir à l’endroit où il n’y avait qu’une porte active sur les quatre. Elles sont toutes activées. Passer celle tout à droite et aller ramasser la pierre ronde dans les racines de l’arbre à droite. Passer la deuxième en partant de la gauche, prendre le papier. Aller tout à gauche, prendre le papier et tourner la manivelle. Aller deux fois à droite et monter les marches. Cliquer sur le bouton, redescendre, aller à gauche et monter à l’échelle. Noter le symbole sur la plaque au mur et entrer dans la porte.

– Aller à gauche et noter le symbole en bas du pilier à gauche. Aller deux fois à droite, ramasser la feuille au sol et prendre le passage dans la fissure. Récupérer la pièce dans une des fissures de la grosse pierre qui flotte à gauche. Revenir à l’endroit où on a débloqué la porte qui était barrée. Aller deux fois à droite et placer les clés dans les trous au mur comme indiqué par les feuilles dans l’inventaire (première rangée, deuxième trou en partant de la gauche : clé triangulaire, troisième rangée, quatrième trou : clé carrée, deuxième rangée, dernier trou : clé ronde). Passer la porte.

– Aller à droite, entrer dans la pièce en face et récupérer l’espèce de torche appuyée contre le mur. Ressortir et aller à droite. Entrer dans la pièce, prendre la feuille et le pavé lumineux caché dans la fente du mur à droite. Ressortir, aller à droite et entrer dans la pièce. Prendre la feuille et ressortir. Aller à droite, prendre le livre posé au sol vers la statue. Entrer dans la pièce et prendre la feuille au sol. Cliquer à la base de la grosse pierre, vers la gauche, pour trouver une pièce. Monter à l’échelle et prendre les plans scotchés au mur. Prendre le passage dans le trou du plafond.

– Prendre l’ampoule sur la rambarde à droite. Aller à gauche et noter le symbole sur l’arbre. Reprendre le passage, descendre l’échelle et ressortir de la pièce. Aller à droite et passer la porte, prendre la feuille et monter à l’échelle. Placer l’espèce de torche dans le trou au mur et mettre l’ampoule chargée sur le coté à gauche. Redescendre et repasser la porte. Aller encore à droite et prendre la clé

– Aller quatre fois à gauche, entrer dans la pièce et monter à l’échelle. Ouvrir le coffre avec la clé et prendre l’ampoule. Retourner sur le toit placer l’ampoule chargée. Redescendre l’échelle et aller deux fois à gauche, cliquer sur la machine au sol et entrer les symboles repérés dans le jeu en suivant l’ordre indiqué par la feuille (une image pour aider : http://i69.photobucket.com/albums/i45/jglecter/illustrations/Submachine7-aide.jpg ). Valider en cliquant sur le triangle en bas à droite.

– Aller neuf fois à gauche, cliquer sur la rambarde à droite et descendre à l’échelle. Aller à droite et monter dans la capsule. Cliquer sur le levier et sortir par la droite. Cliquer sur le bouton au mur au dessus du hublot d’où on sort. Aller à droite et cliquer sur le bouton au mur, monter à l’échelle. Aller à gauche et prendre la feuille.

– Aller deux fois à droite, prendre les deux feuilles et continuer à droite. Abaisser la manette, aller à droite et monter à l’échelle. Prendre le passage dans la fissure du mur à gauche. Aller à droite et prendre la pièce cachée au sol derrière le pied du bureau. Aller deux fois à gauche et prendre la feuille. Continuer à gauche et prendre le passage vert.

Author: Lambda


Submachine 7; english walkthrough


Submachine 7: The Core Walkthrough

The names for the areas and the sub-sections of the game are my own.

To navigate move your cursor to the edge of the screen (or over an open doorway, staircase, or ladder). If the cursor becomes a hand you can click and move in that direction.

Watch for cursor changes that indicate clickable areas. The cursor will change to a hand.

There are 5 secrets in the game. These secrets are tokens that can be used in the super special secret section of the game.

Good luck!

Outside the Barrier

You begin in front of a strange machine with a coiled blue light bulb. Go left.

Okay, you are at a barrier that you cannot go through. Notice the machine leaning against the square stone block appears to need a key card.

Go right back to the blue light machine and go right again.

More odd machinery, including something that is sitting on what looks like a broken column.

On the ground, to the left of the column, is a long steel tube, pick it up.

Go right.

Now you’re at a double light stand, with more bits and pieces of machinery.

To the left of the double light stand is what looks like a stack of round stones in a pile, with a couple of pieces of wood leaning against the pile.

Click on the pieces of wood to move them and pick up the key stone.

Go right.

This looks like a makeshift outdoor dining area, including a cup of coffee on the table.

On the table are two pieces of paper, take them and examine them both. One is a picture (triangle stone key clue) and one is a document.

On the ground next to a large spool of electrical cord is a swipe card, take it.

Notice the box to the right of the spool of cord looks like it needs a key.

Go right.

Okay, looks like the edge of a cliff, no going any further right. On the ground next to the light stand is a picture, take it (key stone clue).

Go left five times until you are back at the barrier.

Put the key card in the machine slot and pull the handle.

The light will go out and the barrier will drop.

Take the light bulb from the lamp and go left.

Behind two partial columns is another barrier.

On top of the taller column (on the right) is a rock, click on it to move it.

Notice that the rock is able to go through the barrier. These barriers are created by the special light bulbs in the round lamps.

Use the steel tube from you inventory on the round light (on the left) to break the bulb and drop the barrier.

The barrier is now down.

Go left.

Inside the Barrier

You should now be at an area with three columns and a pipe running through the bottom of the scene. On the ground in front of the far right column is a valve, take it.

Go left.

A hole has been knocked into a wall on the left to allow cables and pipes to go through. Go left through the hole.

You’ve arrived at a statue of Buddha, surrounded by glowing blue plants.

To the right of the base of the statue, below a satellite dish looking thing, is a brass gong stick. Take it.

Go left.

Here you will see what looks like two machine guns. On the ground are some of those round stones. To the right of the lower machine gun, on top of one of those round stones, is a key. Take it.

Move left.

There are three flower pots here. The two on the left have some of those blue plants in them, the one on the right is empty. Click on the one on the right for a close up.

There’s a red object inside the planter, take it (key stone).

Back up from the close up and go left.

There’s nothing here but some broken stone columns. Go left again.

Okay, now we have a brass gong with three planters behind it.

Use your gong stick to ring the gong.

Click on the middle planter (the one with no plants).

Inside you will find a picture (round stone key clue).

Take the paper, back up from the close up, and go left.

More planters here, these ones are overgrown with the glowing blue plants.

There’s a clickable area between the middle and the right pots. Click on it for a close up.

Take the token, back out of the close up, and go left.

This is a dead end with another Buddha statue. Notice that this one has something in his outstretched right hand. Take the object (key stone).

Go right fourteen (14) times until you are back at the makeshift outdoor dining area.

You may notice as you go past that the area with the broken stone columns has now become a gateway of some kind.

Once you are back at the table, look at the box to the right of the spool of electrical wire.

Use the key on that box to open it.

Click on the box for a close up and take the object from inside (energy gem).

Back up from the close up and go left eleven (11) times until you are at the gate (what used to be the broken stone columns).

On the side of the gateway is a diamond shaped notch the exact same size as the energy gem. Place the energy gem in that notch.

Symbols on the gateway will now light up.

To the right of the gateway is a pedestal, click on it for a close up.

This is where you will place your three key stones. In your inventory you should have a piece of paper titled “winter palace south garden entry” which is the clue to the placement.

The roundest stone goes in the top, the more oblong shaped stone goes in the bottom left, and the diamond shaped stone goes in the lower right.

Once you’ve placed the key stones place the valve in the hole in the center of the pedestal.

Screenshot.

When everything is in place click on the valve to turn it.

Back up from the close up. The gate is now activated and glowing blue.

Click on the gate to enter the Winter Palace.

The Winter Palace Gardens

You are now at the Winter Palace gardens. There is a note on a music stand next to the gate, take it and read it.

Go left.

There is a fountain here, and an archway to the left. Between the fountain and the archway is a plaque welcoming you to the south gardens.

Go left through the archway.

There is a note here tacked on a map stand. Take the note and read it.

Click on the map stand for a close up.

This is a map of the gardens, with a blue “you are here” dot showing your position. This map will become very important later.

Back up from the close up and go left.

You are now looking at four stone gateways, only one of which is “active” (glowing blue), the third from the left.

Click on the glowing gateway to enter it.

On the other side of the gateway there are a lot of blue plants. There is also another map stand, click on it for a close up.

Once again there is a “you are here” dot, showing you in your new position.

Back out of the close up and go right.

Sitting in the middle of the walkway is a key, take it.

Go right.

You’ve reached the end of the path. To the right is a stone door with a square notch in it.

Go left twice to the square gateway and go through.

Back up from the view of the four gateways.

Go right twice until you see the gateway that brought you here.

Go right from the gateway (not through the gateway).

This is the entrance to the Winter Palace. There are two ways to go from here: you can click on the open doorway to go inside, or you can click to the right of the doorways to go along the outside of the building.

Go right along the outside of the building.

You can’t go any further right from here, but there is a ladder going down. Go down the ladder.

At the base of the ladder is a note, read it.

Go right.

Another dead end, this one with what looks like cables clamped to it, running off into the distance.

Go left to the ladder and left again.

At the very edge of the walkway is a triangular shaped object, take it (stone key).

Go right, then go up the ladder.

Go left to the palace entrance, then go inside the palace.

The Winter Palace

The first thing you see inside is a portable stand. Click on the stand to get a brochure about the history of the palace.

Go right.

There’s a locked door here. On the wall above the door is a massive crack. Hover your cursor in the center of the crack and a blue portal will appear.

Click on the portal to travel through it.

There’s a note on the wall about the portal, take it and read it.

Go right.

There’s a stone wall here preventing you from going further right. There is also a 3 x 9 grid of holes on the wall.

Go left twice.

There is a barred door on the left, click on it to remove the bar.

If you go out the doorway you will be back in the area where you found the first portal.

To the right of the door is a doorway with what appears to be a spiral staircase.

Click on the spiral staircase door to enter, then go up the staircase.

At the top of the staircase is a window. You can click on the window to look out and see a platform hovering in the distance.

Go left from the staircase.

Left of where the floor ends a piece of wall appears to hover in space. If you move your mouse over the large crack in this wall fragment another portal will appear.

Click on the portal to travel through it.

You are now on that platform that you saw through the window by the staircase. On the left edge of the platform is a square shaped object (stone key), take it.

On the piece of wall hovering above the platform is the portal back to where you were, click on it to travel.

Once you are back go right to the top of the staircase, then right again.

There is a locked door here. On the floor near the door is a note, take it and read it.

Notice the large crack in the wall directly in front of you. Hover your cursor over the top left of the crack and watch for it to change to a hand. When it does, click for a close up.

In the crack you will find a second token. Take the token and back up from the close up.

Use the key from your inventory to unlock the door.

Once the door is open click on it to enter.

You are in what appears to be an office. On the desk is a piece of paper, take it and read it.

Above the desk on the wall is another copy of the garden map, this one with no “you are here” dots.

On the desk is a machine of some sort, click on the machine for a close up.

Notice the switches on the machine. Three of them are in the up position, and one is in the down position. The one that is down is third from the left.

This is just like the portal gates in the garden, the third from the left was the only one that was activated.

Pull all of the switches into the down position then back up from the close up.

Go left twice to the staircase, then down the spiral staircase.

Once you are at the bottom of the stairs, go left through the door, then left twice more to the entrance of the Winter Palace.

The Winter Palace Gardens (Part 2)

From the entrance of the Winter Palace go left four times until you are facing the four square gates.

Notice that all of the gates are glowing now.

Click on the far left gate to enter it.

This little platform is a dead end. The map stand appears to have been destroyed.

Go back through the gate.

Now go through the gate on the far right.

Next to the gate is another of those maps showing your location. Go right.

The way appears to be blocked by an enormous tree. On the right, in the roots of the tree, is an object, take it (circle stone key).

Go left and then back through the gate.

You’ve already been through the third from the left gate, so all that is left to explore is the second from the left gate.

Click on the second from the left gate to enter it.

Now you’re on a really cool floating platform. There’s another map stand here, showing your location.

There is also a note stuck on one of the broken columns. Take the note and read it.

Go left.

More cool floating platforms. There appears to be a trail going to the upper right, but it isn’t complete.

Go left.

This appears to be a crossroads. Click on the trail that goes to the lower left of the screen.

There is an odd machine here. Click on the valve of the machine and part of it will lower.

There is also a picture on the machine, take it. This is the clue for the square stone key.

Go right.

At the crossroads, click on the path that goes to the upper right to move in that direction.

That incomplete trail has now turned into stairs. Click on the stairs to go up.

At the top of the stairs is a machine with a switch. Flip the switch to the down position.

Go back down the stairs and then go to the left.

Notice that the upper left path, which was a dead end, now has a ladder. Click on the ladder to go up.

Up at the top of the ladder is the other part of the machine we saw at the top of the stairs. There is also a portal gate.

On the machine, above the belt, is a plaque. Click on it for a close up and make a note of the symbol there.

Back up from the close up of the plaque and click on the gate to enter it.

You are now in another part of the garden. Near the gate in front of you is another map stand, which you can click on to check your location.

Go left.

At the very edge of the platform, click on the base of the arch post to see another mysterious symbol. Make a note of it.

Back up from the close up of the symbol, go right to the gate, then right again.

On the floor, mostly hidden by a post, is a picture, take it. This is the final clue for the stone keys.

On the fragment of wall to the right is a small portal, click on it.

You are now on the other side of the portal. The portal back is in the wall floating to the left.

Hover your cursor over the large crack to the left of the back portal and click for a close up.

Here’s another token, take it.

Go right.

There is a pretty tree with blue leave here. Go right again.

There is a ladder here, attached to some sort of control box. Look at the box closely and you will see that the lever has been broken off.

Use the gong stick on the broken lever.

Now that the lever has been repaired, click on it.

The ladder will drop down, enabling you to continue to the right. Go right.

On a stone overhang above the middle of the walkway is another one of those plaques with yet another mysterious symbol. Make a note of the symbol, then go right.

Recognize this place? This is the dead end platform that you access from using the far left garden gate.

Click on the gate to enter.

You are now back at the view of the four garden gates. Back up and go right three times to the entrance of the Winter Palace.

The Winter Palace (Part 2)

Click on the doorway to enter the Winter Palace.

Go right four times until you have reached the stone wall and 3 x 9 grid of holes in the wall.

Time to solve the stone key puzzle.

Once the stone keys are in their proper places the wall to the right will lift up.

Go right.

This is the entrance to a large atrium with several observatories. Go right.

You are facing a statue of a woman and some empty sign posts. There is a doorway in front of you, click on it to enter.

Leaning against the left wall is part of a transmitter, take it.

You can look through the telescope to see a view of…something strange.

Back up to the atrium and go right.

Now there’s a statue of a man with his arm upraised. Ahead is another dark doorway, click on it to enter.

The telescope appears to be missing from its mount. At the base of the mount is a picture, take it (capsule call instructions).

There is a large crack in the right wall, click on it for a close up.

In the crack is a glowing box. Take the box and back up from the close up.

Click on the ladder on the left to go up.

There’s a box up here that is locked.

Go back down the ladder, then back to the atrium.

Go right.

There’s a control mechanism here. If you click on it for a close up you will see that some of the lights at the bottom are red.

You will also notice that you need to input five symbols, which look like the symbols you’ve been seeing in the Winter Palace Gardens.

Back up from the close up and go through the doorway in front of you.

There’s a note on the floor, take it.

Back up to the atrium and go right.

On the floor to the left of the statue is a note, take it.

Go through the doorway ahead.

There’s a lot of scattered paper on the floor. On the right, underneath the ladder, is one piece of paper that appears to have writing on it. Take it.

Click on the left of the telescope base for a close up. Here’s another token. Take it and back up from the close up.

Click on the ladder to go up.

On the walls are three pictures, take them.

In the hole in the ceiling is another transportation portal. Click on it.

On the low railing to the right is an object, take it (solenoid).

Go left.

This appears to be the other side of the giant tree that was blocking the path in the garden. On the tree trunk is another plaque with a symbol, make a note of it.

Go right.

The portal back is in the center of the crack in the wall in front of you. Go back.

Go down the ladder and back to the atrium.

Go right.

There is a doorway in front of you and a break in the wall to the right.

Go right.

On one of the floating stones you will find a key.

Take the key and go left.

Now go forward through the doorway.

You are on a ledge outside of the atrium. Below the ladder on the right is a picture, take it (symbol combination).

Go up the ladder.

There is a communications dish up here that appears to be missing two solenoids and a transmitter.

Go down the ladder and go through the doorway.

Go left three times until you are facing the statue with the upraised arm.

Go forward into the doorway by the statue.

Go up the ladder and use the key on the locked box.

Take the solenoid from the box.

Go down the ladder and back to the atrium.

Go right three times and forward through the doorway.

Go up the ladder and place the transmitter part and the two solenoids in the dish to repair it.

Once the parts are in place, go down the ladder, through the doorway, and left twice.

Click on the machine controller for a close up and notice that the bottom lights are now green.

Now you just have to figure out the symbol order.

Back up from the close up.

Go left nine times until you are outside the Winter Palace.

Calling the Capsule

Go left four times until you are facing the four garden gates.

Go through the third from the left gate, then go right twice to the stone door with the square notch.

Place the glowing box in the square notch and the door will open.

This is the last symbol, make a note of it.

Time to determine the order of the symbols.

Back up from the close up, then go left twice and through the gate.

Back up from the gates and go right three times to the palace.

Enter the palace and go right eight times until you are back at the controller.

Spoiler

If the knob stays to the right after you turn it, you got the combination correct and you will hear some machinery rattling.

Back up from the close up of the machine, and go left nine times until you are at the entrance of the palace.

Now go right, past the palace doors.

Go down the stairs to the lower platform, and go right.

The capsule has come down the cables and is waiting.

Click on the capsule door to enter.

The Capsule

Click on the lever to move the capsule.

When you reach your destination the door on the right will open, go to the right.

You are now in a larger area. There’s a switch above the capsule that you can pull to the right.

Go right.

There is a small switch on the wall, click on it and the floor will extend over to the ladder.

Go down the ladder.

At the bottom of the ladder, to the left, you can see where a lamp fixture has fallen down.

Put the light bulb on the pipe where the fixture sat and the grate to the left will open up.

You can go left into the grate, but it’s dark and there’s nothing there. Go back up the ladder.

Go up again and you are facing a large window.

Go left.

On the desk is a paper, take it.

Go right twice and you will find two more papers on music stands. Take them.

Go right.

There’s a force field to the right. Pull the lever on the control panel to turn off the field.

Go right.

Go up the ladder.

To the left of the ladder is a portal, click on it.

You are facing a broken window. Below the window is a hatch. Move the levers and open the hatch, it is the way to the ladder.

Go right.

There is a letter on the desk, take it.

There is also another copy of the garden map leaning against the right wall.

There is a hotspit behind the left back chair leg of the desk. Click on it to get the last token.

Back up from the close up.

Go left twice.

There is a note taped to the fancy red chair, take it.

You can open the drawers on the desk, but they appear to be empty.

There’s a lever to the left of the chair, pull it.

Go left and you will see the large portal through the break in the wall.

Click on the portal and you are finished.

Or don’t click, and go find the super secret bonus special stuff.

Super Secret Bonus Special

Instead of clicking on the portal, go right to the fancy chair where you pulled the lever.

Go right, then down the ladder.

Go left three times, then down the ladder twice until you are back where you placed the light bulb.

Go left through the now open grate.

The tunnel has now gotten bigger. If you hover your cursor over the wall of the tunnel, you will find a portal. Click on it.

There’s a sign here that welcomes you to the super secret bonus special place.

If you go to the right from here, you will find those observation machines like you find at tourist attractions. Each one has a comment from Matuesz Skutnik about the making of the game.

To make a machine work you need a token. To make all five of the machines work you need to have found all five tokens.

After you’ve spent the tokens, you can go back and go through the big green portal.

Written by Dora on jayisgames.com


Submachine 7; video walkthrough


Submachine 7; jay is games review


Mateusz Skutnik’s Submachine series has kept puzzle and adventure game fans guessing for over five years. With its eerie atmosphere and mysterious narrative, each subsequent installment has only served to raise more questions and wild speculation amongst its fans. If you’ve been waiting patiently (or not so patiently) for another chapter, your loyalty is about to be rewarded. Submachine 7: The Core is finally here… and it’s waiting for you to unlock its secrets.

Use your mouse to interact with your environment and pick up items, which are stored in your inventory on the right. You can click once on an item you’re carrying to pick it up, and then again anywhere else on the screen you want to try using it. Investigate everywhere, sometimes more than once; if something has happened and you’ve made progress, it’s worth revisiting old areas to see if anything has changed, or if you can interact with something new. Since the game saves your progress automatically, you can take time out whenever you want to scrawl “What does it mean?!” over and over on your walls (it’s very therapeutic) before picking up right where you left off.

Analysis: I am going to be honest with you; until now, I had never played any of the Submachine games, and playing them all back to back to prepare myself for this review was a lot like wandering around inside a M.C. Escher painting with H.G. Wells and H.P. Lovecraft as travelling companions. (Hunter S Thompson might have been there too, flicking the back of my head every few minutes.) The series is baffling and intriguing, and has only gotten bigger and more complex as it’s gone on. To say it’s ambitious is putting it mildly, and the fact that Mateusz appears to have only gotten more creative with his brainchild with each chapter is really impressive.

It’s easy to see why the series has earned such a devoted following. Not only is it extremely well made, with subtle ambient noise and clean visuals, but its sparse narrative revealed in notes and snippets for years has fueled a lot of wild speculation. By now Mateusz has his series down to an art and exploring the game just for the sake of enjoying the gorgeous design is rewarding too. The biggest problem you might run into is that like most other games in the series, The Core is prone to giving you very little direction. You might spend a while flailing at switches or spinning valves, not realising that your monkey-like problem solving antics have actually triggered something in a different area even if there was little or no indication anything had changed. You’ll also have to keep your eyes open for small items, and be willing to examine all corners of each area; I spent a while going around in circles, not realising I’d actually missed an area transition next to another one.

Although it initially seems like a very small game, The Core quickly reveals itself to have a big environment for you to explore… provided, of course, you can figure out how to unlock it all. Players hoping for more brain-teasing puzzles such as those found in Submachine 3: The Loop might wish the Core found more balance between those and “use this item here” school of puzzling typically found in adventure games. The game is definitely challenging and requires you to keep your eyes peeled and be diligent in exploring your environment, sometimes more than once. Compared to most other games in the genre, making even a little progress in The Core (or even any game in the series) tends to feel like a big achievement, so go ahead… pat yourself on the back now and again. If you’ve come this far, you’ve certainly earned it.

If you’re hoping for a resolution and answers to all your questions, you might find the “To Be Continued” finale just another reason to camp outside Mateusz’s doorstep. Submachine 7: The Core still offers a lot more pieces of the puzzle, and provides a fantastic realm full of secrets to uncover them in. And, perhaps most important for an adventure game, the series as a whole actually feels like an adventure. So, I’ve got to ask… why are you even still reading this when there’s a whole new world out there for you to explore? Allons-y!

Author: Dora on jayisgames.com


Submachine 7; -ak- review


Submachine 7: The Core has been on our Gaming Most-Wanted List of 2010 and for good reasons too: Submachine series is one of most beloved gaming brands ever developed for the great territory of internet. Each installment brings Mateusz’s patented imagination to life through simple yet appealing graphic, compelling and intriguing on-going story, haunting and memorable ambients, and best of all, the highly polished gameplay that puts almost every other PNC games to shame. Hypes for Sub_7 exploded through the roof comparable to extremely long wait of Sub_6, only to be made worst after the releases of critical darling’s Submachine Network Exploration Experience and Submachine: 32 Chambers. The wait was unbearable and in the end came possibly what everyone was hoping to be an incredible cap-off of the fabled Year of the Submachine.

Does Submachine 7: The Core delivers, meets, and exceeds our expectations? The most resounding answer sung by chorus of hungry players is YES. Yes, indeed. Best Submachine game ever? Read on.

GRAPHIC

Again, it seems unfair that I have to continue to do this section of review, especially since each Submachine game is eerily beautiful in their ways and that there’s almost no flaw to Mateusz’s art direction. But what so different about this game is that the art direction totally blew our expectations of what Submachine should looks like and how the location designs and structures should be built. All of sudden, the constricting areas of blocky rooms within screen was thrown away in favor of wide-open areas located within one giant location and the art style became extremely rich and imaginative as result of it.

The fractured architects will be one of most memorable places ever visited in any Submachine games, powered by insanely immense structure and its haunting erosions backed by beautiful lifeforms. Not only the art styles breath new life because of shift in art direction, it also bolster toward and from the story as well, making the designs of entire game an absolutely, creatively, and breathlessly jaw-dropping. The art and graphic alone also pushed the doors wide open for even truly spellbinding locations possibly waiting for us in Submachine 8 and eventually in SubNet.

Absolutely perfect.

Also… cutely glowing lifeforms. Who wouldn’t like them?

Score: 10 / 10

SOUND

An upgrade over what I deemed as “disappointing soundtracks” of Submachine 6. What we get is a true return-to-form ambients that made Submachine 1-5 truly haunting games to explore and play. The tunes may not be as heavily memorable as many of classics, but they still have tons of Submachine signatures all over with electronic noises, chirps, and beeps bringing the machines to life. The ambients are also transcendent, not only highlighting the atmosphere of each locations, but also lending emotional impacts to the in-game plot development that would send chills down to everyone’s spines. Also supplementing the ambients are well-thought-of sound effects, making each notable activities extremely realistic and satisfying.

Expertly made and applied ambients and sound effects had made this game one of best Submachine games to listen to while playing. It would guarantee to make your ears cry with joys.

Score: 10 / 10

PLOT

After the satisfying plot-heavy Submachine 6, many of us thought we will get sizable chunks of stories to chow down on. What we experienced through was a major revelation, the greatest since eye-opening plot of Submachine 4. Mateusz has truly nailed down on the evolving plot developments, making this game a true gem to read and marvel at. Almost every area brings something new to the developing Submachine lore and Submachine 7 stories might be the best since fan’s favorite Submachine 4. And to the delight of fans all over, the stories of entire Submachine series are brought to almost full circle and that is not even the end of it. It only the beginning of something truly amazing yet to be come in final three episodes. What made this story truly memorable is that it also lends strength to art direction and gameplay, making this game addicting to play and scavenge through for its tasty secrets.

Although, the main criticisms is that there are so much of stories to scrooge through, it could leave some players drunk and confused by wealth of revelations. Also, some players might be disappointed that the Core aren’t what they expected, but I found it to be well written enough for the Core itself to shatter player’s expectation of what the areas should be like. Heck, I thought the Core would be machine-heavy, but it wasn’t the case. The standout of entire plot is the relationship between Liz and Mur finally made clear as well as the development of Submachine itself, shattering the boundaries of what Submachine truly is once again.

Also, Submachine 7 totally killed some of my famous theories. Thanks a lot.

Truly fantastic.

Score: 9.9 / 10

GAMEPLAY

Submachine 7 has finally offer extremely enjoyable exploration and biting-hard puzzle-solving not seen since Submachine 2, 4, and 5. What made Submachine 7 one of best PNC games around is the craft and care put into many of puzzles that are very different from all other games. The Core is a tough one to crack and one that require lot of thoughts and deductions to solve and beat. It not hair-pulling hard, but it no cake-walk either. The difficulty is just about perfect where newcomer and avid veterans can find satisfying challenges to overcome.

My criticisms is that the secrets are so dang tough to find, but I guess it made the rewards at the end all the more satisfying. Also, few of puzzles are extremely hard, it took me a while to figure out the answer, but that’s a nice change of pace from other Submachine games since we do have hints available to nudge us into right direction. Also, some of areas are so large that it felt bit unnecessary to have one or two extra rooms to explore in and I feel worried that the next three games will become too ambitious for their own goods. That why we have SubNet to dump the ideas into.

Expertly balanced.

Score: 9.8 / 10

In the end, Submachine 7 constantly screwing with our expectations and wowing us with tons of plot developments and eerily beautiful art styles that will sure to spark off new wave of speculations about what Submachines truly are and what they’re made for. I have never seen the reactions quite like this since the famous Submachine 4 and for good reasons too.

Is it the best Submachine game ever?

YES and NO.

Wait, why?

The answer: Submachine 4.

Submachine 4 and Submachine 7 are so similar and so different in every way. Both games offer truly compelling gameplay backed by haunting arts and ambients. Both have addicting stories that blew the doors wide open, welcoming all sort of heated debates and speculations. What they’re so different is that both offers extremely different experiences, plot developments, locations to explore, and theories to create. Submachine 7 reminds me what Submachine 4 brought to the table all those years ago and that made Submachine 7 all so great to play. It not really fair for me to say Submachine 7 is better than Submachine 4, but it also not fair for me to say that Sub_4 is better than Sub_7. No, I will leave that debate to the fans.

As for me, I believed that both games are truly excellent for same and different reasons and I am proud to say that Submachine 7 is the best game since Submachine 4 and that both games are the absolute best in entire series.

You truly outdid yourself once again, Mateusz.

Final Score9.8 / 10

One more thing: CUTELY GLOWING LIFEFORMS


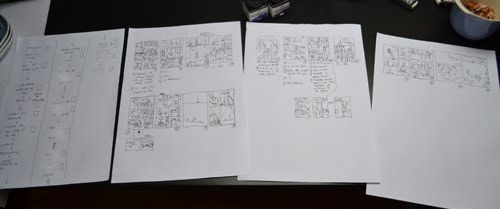
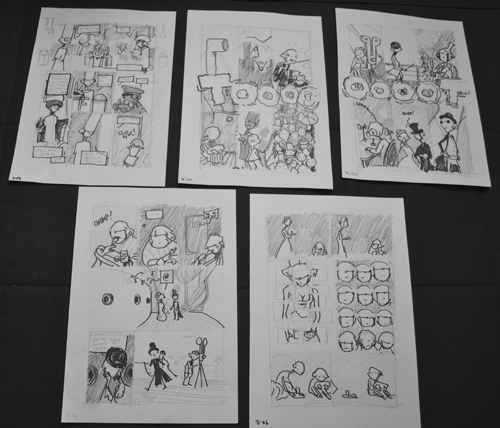
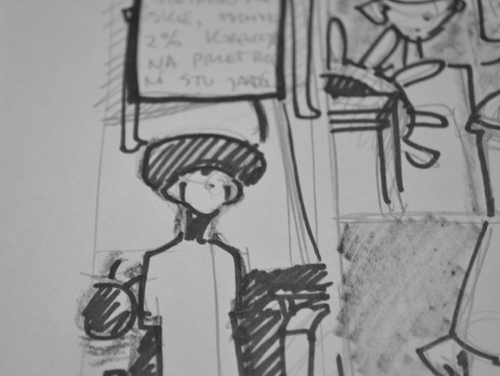
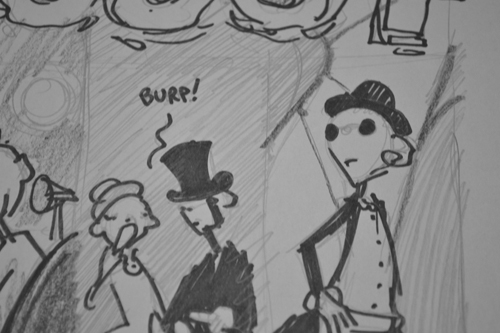
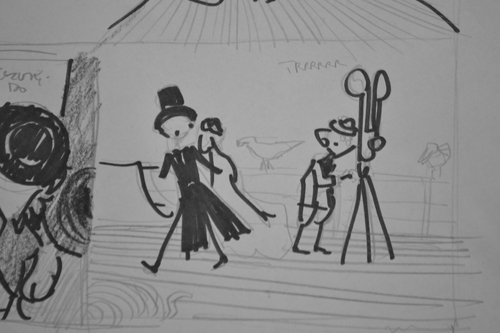
daymare town conceptual sketches


well kind of nowhere, because I’m in the middle of sub7 development, this came out of my head. (just said that my head = nowhere, but I don’t mind).


« Previous PageNext Page »